Kitchen Science for Kids
Aside from cooking and writing about food, one of my greatest passions in life is teaching science to children. Because science is so real and so hands-on, it is super engaging and exciting to most children. In the summers, I spend a week teaching and directing a summer science camp program for young children. Each of my camps has a theme. So far, I have created a bug camp, a rock camp, a bird camp, a weather camp, a fish camp, and an owl camp. Putting the camps together is a lot of work, but it has become a meaningful experience for me, my children, and the other kids who come.
In addition to science camps, we also love science fairs at our house. Recently, my daughter entered her first science fair. She asked the question, “What will melt the fastest-butter, cheese, chocolate, ice, ice cream, marshmallows, or snow?” She learned all about melting points and her dad helped her come up with a detailed procedure for answering her question. In the end, it was snow that melted the fastest. My mother’s heart swelled with pride when she earned a fifth place ribbon for her project, and she was pretty ecstatic too.
I love doing science experiments with my kids; especially experiments in the kitchen. Here are some great beginner kitchen science projects you may want to try.
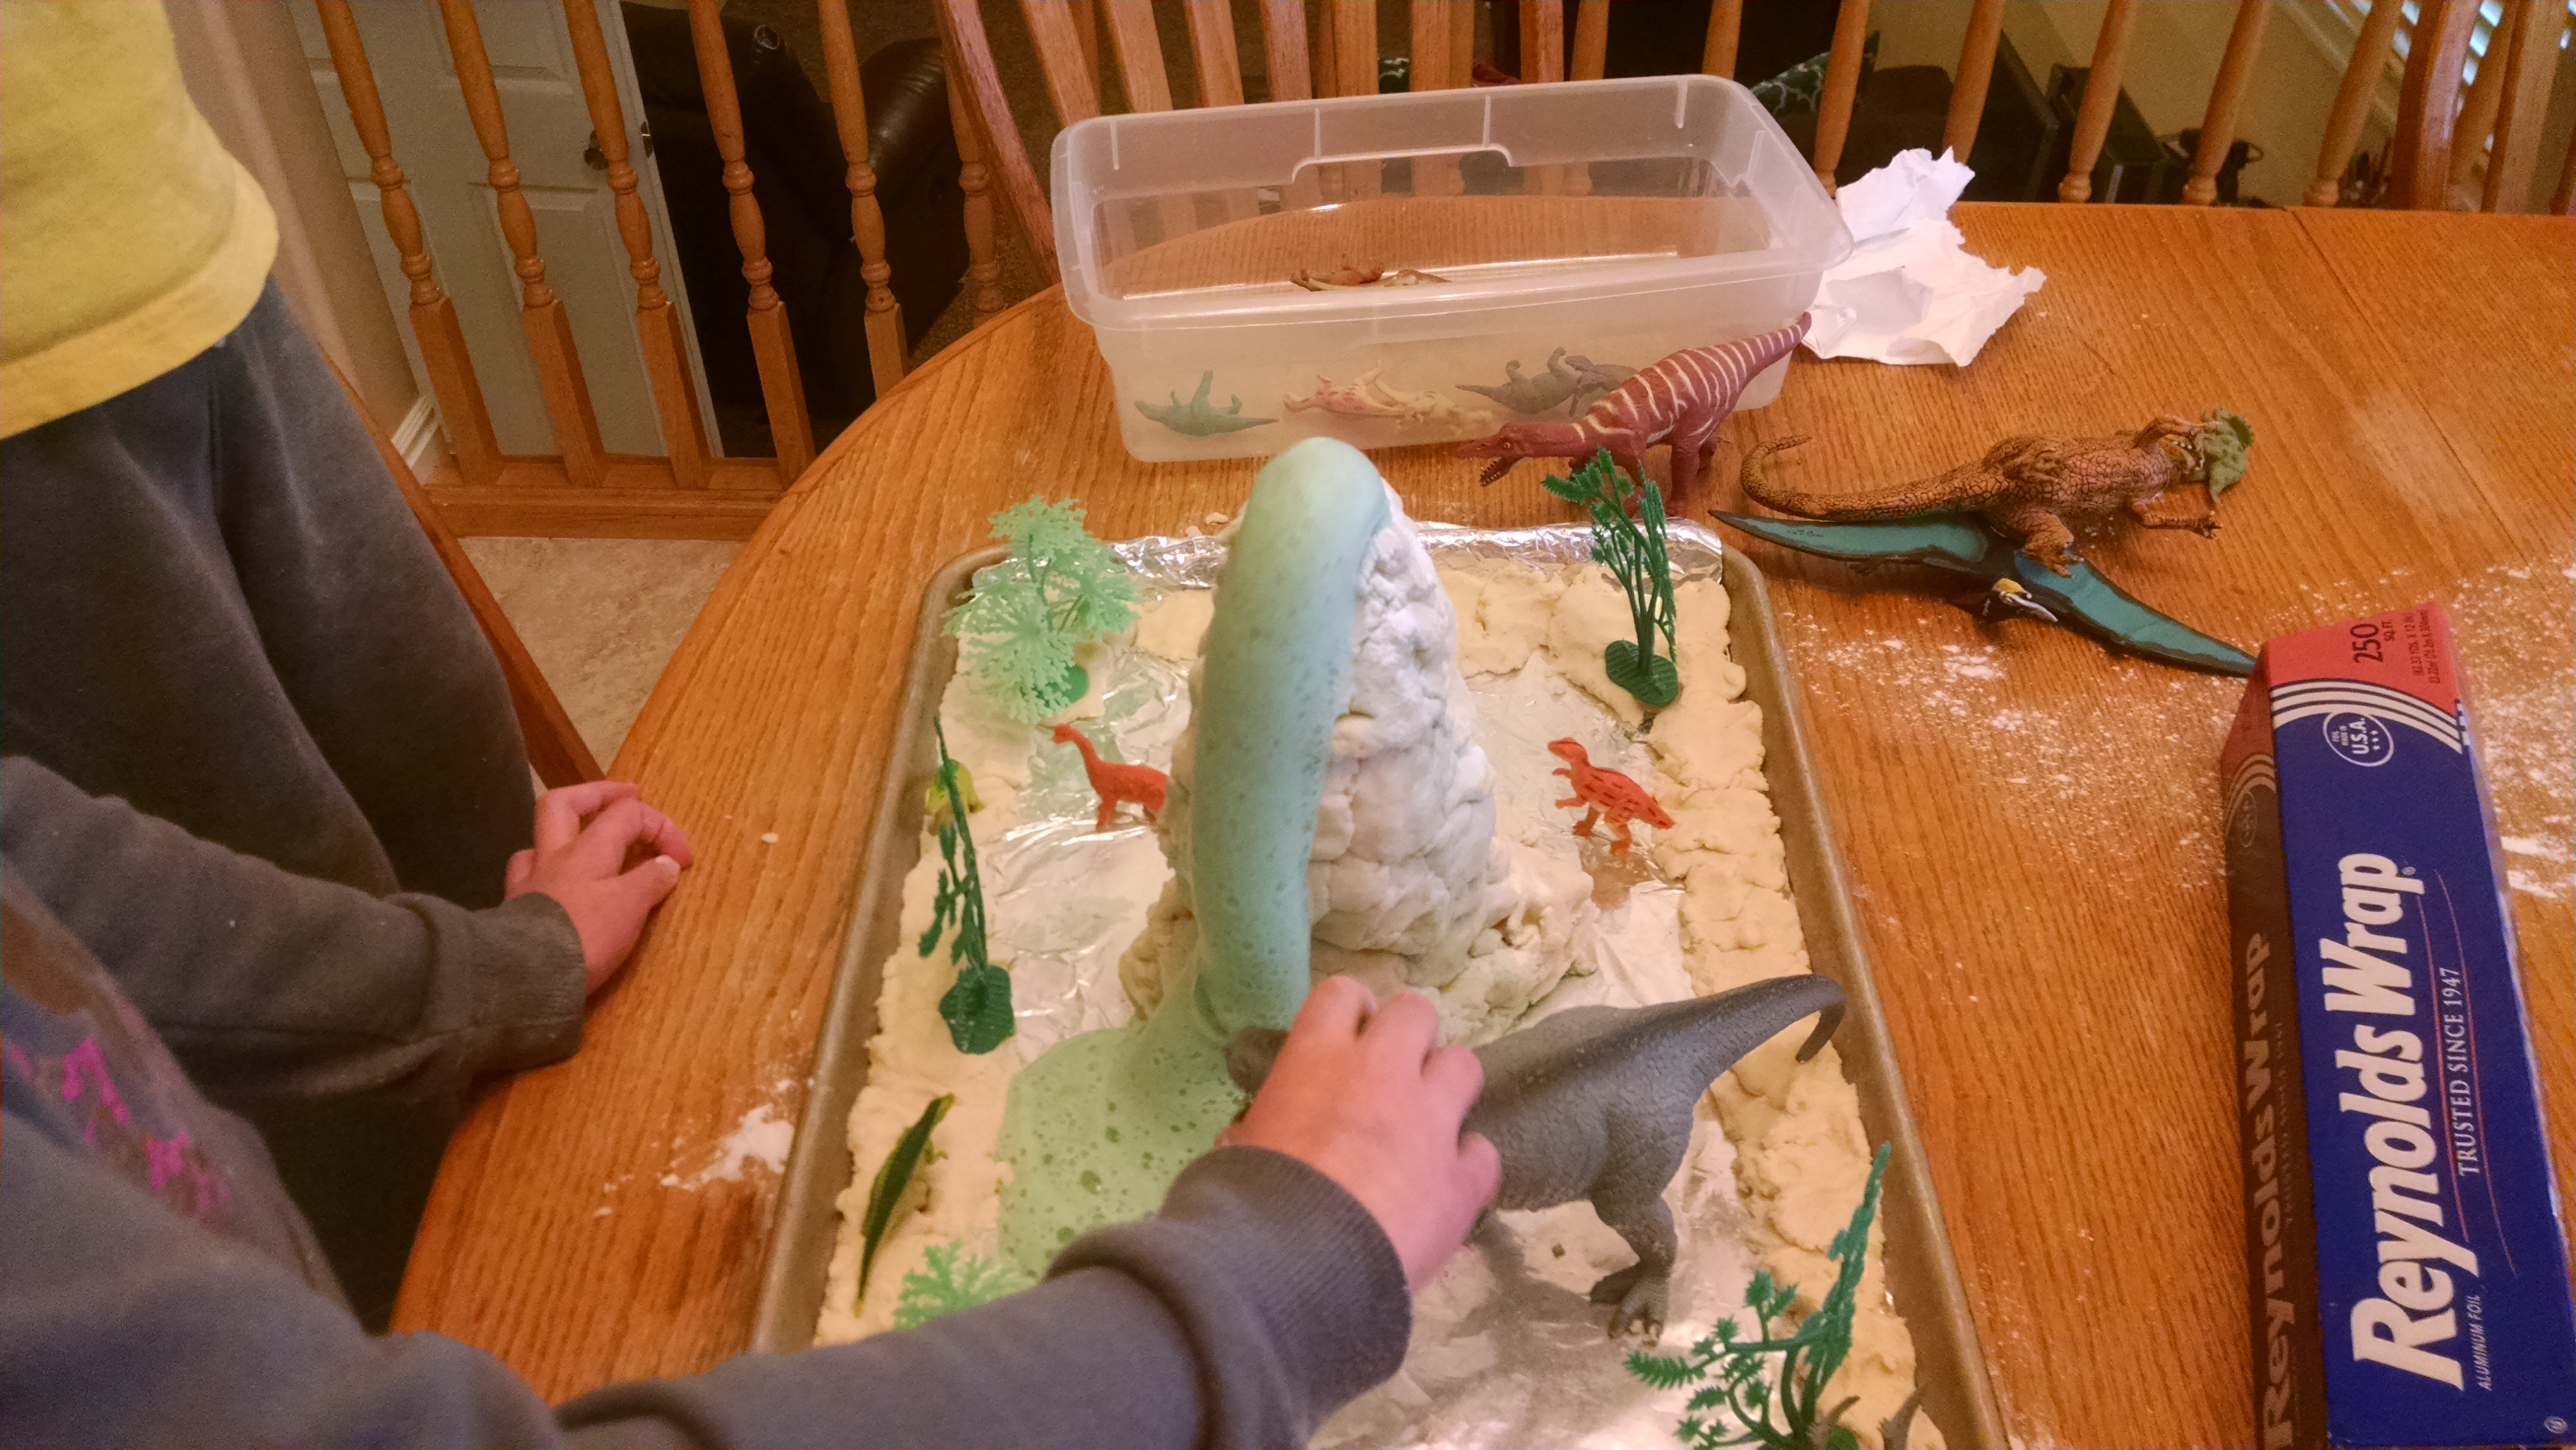
- Salt Dough Volcanoes – Most of you have probably seen or made a model of an exploding volcano at some point in your life... But I am here to tell you that to children, this project NEVER gets old. They love to make volcanoes! There are lots of different ways to make a model, but my favorite way starts with salt dough and an empty 16 oz water bottle. After making the salt dough, place the empty water bottle on a large cookie sheet. Use the salt dough to build a volcano around the water bottle. Using a funnel, fill the water bottle about half way full with some vinegar, a few drops of dish soap, and a few drops of food coloring. When you are ready for the explosion, add two tablespoons of baking soda and watch it go!
- Vinegar & Baking Soda Pictures - If you don’t want to go all out with the volcano, this is a more simple way of enjoying the chemical reaction that occurs between vinegar and baking soda. Spread a layer of baking soda on a tray or cookie sheet. Pour small amounts of vinegar into several cups. Place a drop of food coloring in each cup so you have several cups of different colors. Using a small medicine dropper, suck up some vinegar and squirt it onto the tray of baking soda. The kids will love the bubbling that occurs and the colorful pictures they create.
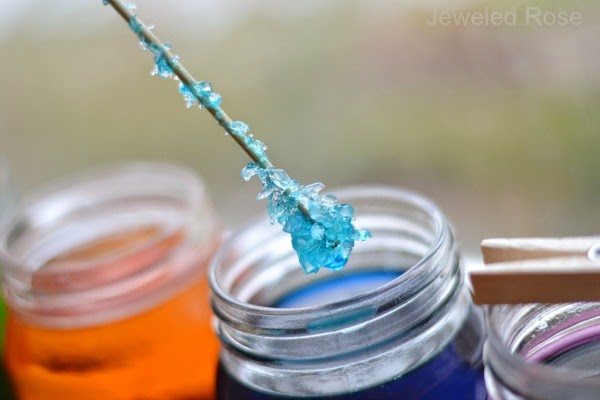
- Rock Candy- In my opinion, there is no better way to learn about how crystals form than by making some rock candy. Of course, this isn’t the instant excitement of an erupting volcano; it will take some time, probably a week or more, to grow your rock candy crystals. The Internet is busting with rock candy recipes. Give one a try!
- How Arctic Animals Keep Warm – And now for the easiest kitchen science experiment ever... All you need is a bowl of ice water and a can of shortening. Teach your kids about an Arctic Animal like polar bears or whales. Explain that they have a layer of blubber or fat that keeps them warm. Have your kids place their bare finger into the bowl of ice water first to see how cold it is. Then coat their finger with shortening and have them put the shortening finger into the bowl. They should notice that the water doesn’t feel as cold on the fat layered finger.
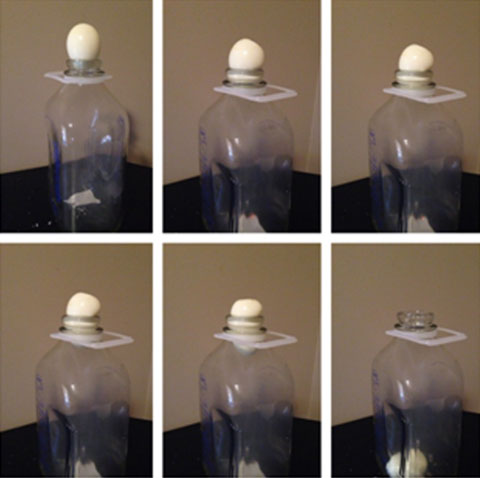
- Egg Science Experiments – At the school I taught at, we had a book of nothing but egg science experiments. There are so many things you can do with eggs! One of my favorites (and one of the easiest) is sucking a hard-boiled egg into a glass bottle. You will need a glass bottle with an opening that is slightly smaller than the egg, a match, and a small strip of paper. Light the strip of paper on fire and quickly place it in the bottle. Set the egg on top. The air pressure inside the bottle changes and sucks the egg into the bottle.
- Metamorphic Cookies Bars – At my rock science camp, we learned all about different kinds of rocks. To help the kids understand metamorphic rocks we made cookie bars. Metamorphic rocks are exsisting rocks that are transformed by high heat and pressure. We watched how the ingredients in the cookie bars transformed and changed as they were baked in the oven. It was a hit; and they were pretty yummy too!
Metamorphic Cookie Bars
1/2 cup (or one stick) of butter
2-3 packages of graham crackers (most regular sized boxes of graham crackers come with 4 packages inside)
1 12 oz bag of chocolate chips
1 12 oz bag of butterscotch chips
2 cups shredded coconut
1 14 oz can sweetened condensed milk
Directions: Preheat oven to 350 degrees. Place the butter in a 9 x 13 pan. Put the pan with the butter in the oven while it is preheating to melt the butter. Crush the packages of graham crackers inside a large ziplock bag. Once the butter is melted, pour the graham crackers on top of the butter. Continue layering the ingredients one by one. At the end, pour the sweetened condensed milk on top. Bake in the oven for 20 minutes. Enjoy!
I hope this gives you at least one or two new kitchen science experiments to try. If nothing else, just cook with your kids! Cooking and baking are great lessons in chemistry.
- https://www.growingajeweledrose.com/2015/02/rock-candy-experiment.html
- www.sciencecamps.blogspot.com
- https://scifun.chem.wisc.edu/HOMEEXPTS/EggInBottle.htm
- https://www.physicscentral.com/experiment/physicsathome/eqq-squeeze.cfm
 Cristina Duke
Monthly Newsletter Contributor since 2014
Email the author! cristina@dvo.com