How to Ripen Bananas Zippy Quick, How to SLOW Ripening, and a TO-DIE-FOR Banana Pudding Recipe!
Ever have the situation where you needed to make some banana bread and your bananas weren’t quite ripe enough? Me too.
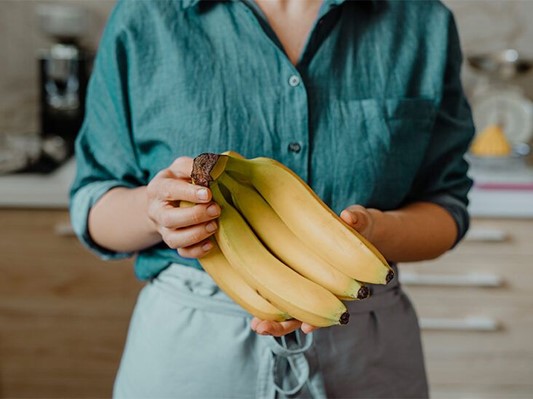
It’s with this dilemma in mind that I share some great information from Martha Stewart via one of her writers, Bridget Shirvell. Apparently, Bridget has had the same experience and discovered how to remedy it, zippy quick!
Bridget says, “…there are ways to speed up the banana ripening process. Whether you have three days or three minutes, here is the right way to ripen bananas.”
First of all, it’s good to know what a ripe banana looks like. It can be hard to know precisely when a banana is ripe just from looking at it, as it's based somewhat on personal preference for firmness and sweetness. Sometimes even yellow bananas have a slight 'green' flavor. Generally, though, a banana is ripe as soon as it is yellow and you no longer see any green. And we all know that as brown spots start to show up, the banana will taste sweeter. But to be sure you’ve got a banana where you want it, the obvious solution is to just taste it.
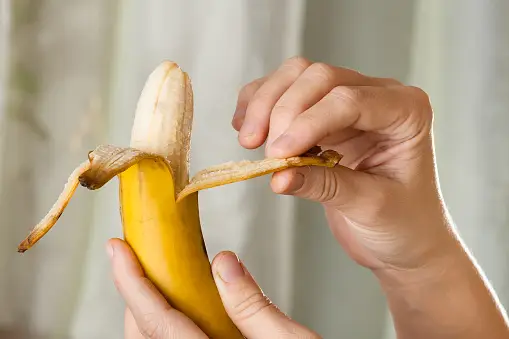
Assuming your bananas aren’t where you want them, here’s what Bridget says to do:
If you have one to three days before you need to make your banana bread or that banana cream pie, make sure the stems are unwrapped and you're storing them somewhere warm. This is where ethylene (the magic ripening gas) is produced. Storing them in a warm place excites the ethylene gas and speeds up the ripening process.
You can also place the bananas in a brown paper bag, which will trap the ethylene gasses the bananas produce and trigger even faster ripening.
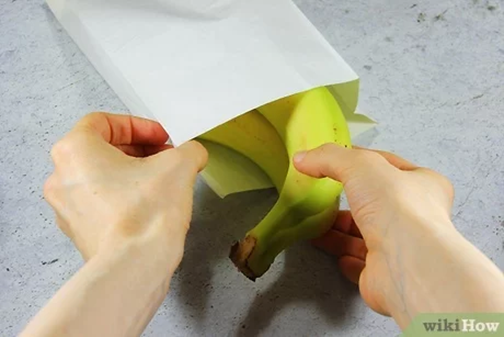
If you know you'll need ripe bananas tomorrow, add other ethylene-producing fruits such as avocados, apples, melons, pears, or peaches to that brown paper bag. Just keep in mind, especially with the avocados, that those fruits will ripen quicker, too.
Lastly, what if you need ‘em ripe TODAY? Bridget says, “Don't worry; you can ripen bananas in less than a day and even in less than an hour.” [Me: REALLY?]
Yup. All thanks to the microwave. Just peel the banana and microwave it for 30 seconds to a minute, and watch how that helps.
Another super-fast-ripening process is to cook the bananas in the oven at 350 degrees Fahrenheit, but you'll want to leave the skins on for that method. After about 10 to 20 minutes, when the skins turn black, they're ready to take out and ready for use.
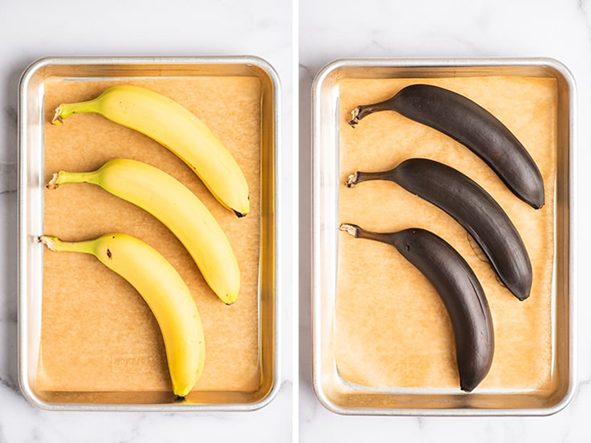
Here’s the deal though: If you only have a few hours or minutes, it makes sense to cook the bananas at 350 degrees or microwave them for a few minutes to get them soft. But the problem is that these are thermally induced approaches, so it actually doesn't do much to change the chemical composition of the bananas, only the physical structure.
In other words, while the bananas will be softer, they won't be sweeter, so you'll want to keep that in mind if you are counting on their sweetness as a flavor contributor to whatever you’re making.
On the flipside, what if you don't want your bananas to get too ripe too quickly? Ethylene gas figures into this as well. Slow the ethylene gas production and you’ll slow the ripening process. Simply separate them from one another and keep them in an open, cool space so their ethylene gas doesn’t concentrate. Then once they’re ripe, refrigerate them for a couple days. And remember, freezing them buys you time as well.
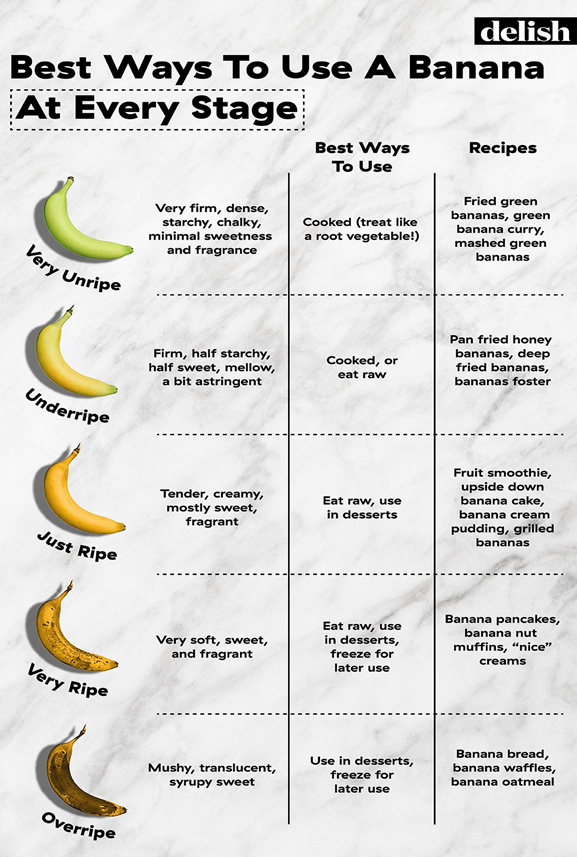
I’ll close with a really helpful chart from www.delish.com on the best ways to use a banana, no matter at what stage it is. Who knew green bananas could be cooked and used in curry!?
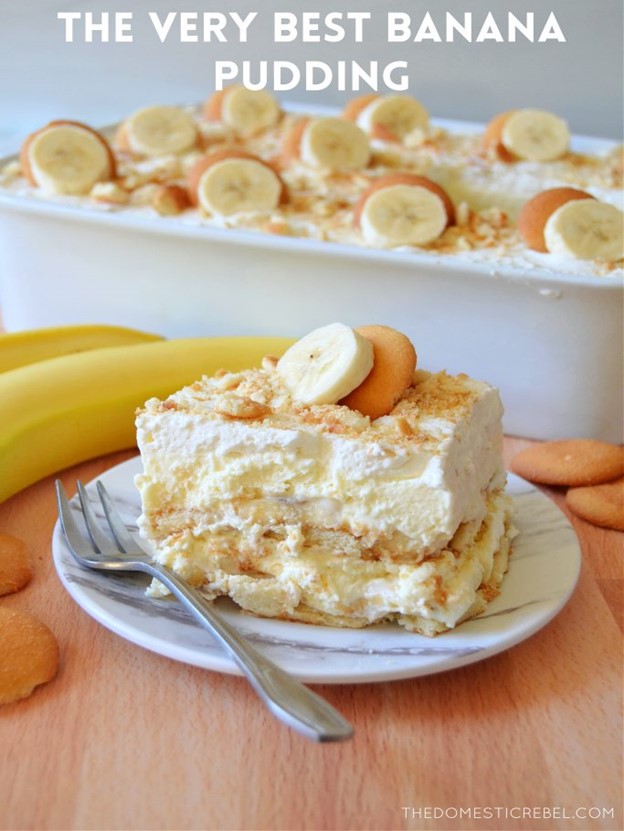
And then check out this recipe for banana pudding. It actually uses bananas that are just barely ripe. The recipe creator, Hayley (www.domesticrebel.com) says “This truly is the very BEST banana pudding EVER! Rich and creamy yet light and fluffy and packed with amazing, fresh banana flavor in every mouthwatering bite! This is sure to become a crowd-pleaser and family fave!”
2 1/2 cups heavy whipping cream
3/4 cup confectioners' sugar
1 teaspoon vanilla extract
1 (8-ounce) package cream cheese softened
1 (14-ounce) can sweetened condensed milk
1 (5-ounce) box instant banana pudding mix (just the dry powder)
1 cup 2% or whole milk
1 (11-ounce) box Nilla Wafers
8 (about) medium bananas sliced (make sure they're BARELY ripe - too ripe/soft and they'll brown faster and affect the pudding flavor)
Directions:
Add Recipe to Cook'n

It’s with this dilemma in mind that I share some great information from Martha Stewart via one of her writers, Bridget Shirvell. Apparently, Bridget has had the same experience and discovered how to remedy it, zippy quick!
Bridget says, “…there are ways to speed up the banana ripening process. Whether you have three days or three minutes, here is the right way to ripen bananas.”
First of all, it’s good to know what a ripe banana looks like. It can be hard to know precisely when a banana is ripe just from looking at it, as it's based somewhat on personal preference for firmness and sweetness. Sometimes even yellow bananas have a slight 'green' flavor. Generally, though, a banana is ripe as soon as it is yellow and you no longer see any green. And we all know that as brown spots start to show up, the banana will taste sweeter. But to be sure you’ve got a banana where you want it, the obvious solution is to just taste it.

Assuming your bananas aren’t where you want them, here’s what Bridget says to do:
If you have one to three days before you need to make your banana bread or that banana cream pie, make sure the stems are unwrapped and you're storing them somewhere warm. This is where ethylene (the magic ripening gas) is produced. Storing them in a warm place excites the ethylene gas and speeds up the ripening process.
You can also place the bananas in a brown paper bag, which will trap the ethylene gasses the bananas produce and trigger even faster ripening.

If you know you'll need ripe bananas tomorrow, add other ethylene-producing fruits such as avocados, apples, melons, pears, or peaches to that brown paper bag. Just keep in mind, especially with the avocados, that those fruits will ripen quicker, too.
Lastly, what if you need ‘em ripe TODAY? Bridget says, “Don't worry; you can ripen bananas in less than a day and even in less than an hour.” [Me: REALLY?]
Yup. All thanks to the microwave. Just peel the banana and microwave it for 30 seconds to a minute, and watch how that helps.
Another super-fast-ripening process is to cook the bananas in the oven at 350 degrees Fahrenheit, but you'll want to leave the skins on for that method. After about 10 to 20 minutes, when the skins turn black, they're ready to take out and ready for use.

Here’s the deal though: If you only have a few hours or minutes, it makes sense to cook the bananas at 350 degrees or microwave them for a few minutes to get them soft. But the problem is that these are thermally induced approaches, so it actually doesn't do much to change the chemical composition of the bananas, only the physical structure.
In other words, while the bananas will be softer, they won't be sweeter, so you'll want to keep that in mind if you are counting on their sweetness as a flavor contributor to whatever you’re making.
On the flipside, what if you don't want your bananas to get too ripe too quickly? Ethylene gas figures into this as well. Slow the ethylene gas production and you’ll slow the ripening process. Simply separate them from one another and keep them in an open, cool space so their ethylene gas doesn’t concentrate. Then once they’re ripe, refrigerate them for a couple days. And remember, freezing them buys you time as well.
I’ll close with a really helpful chart from www.delish.com on the best ways to use a banana, no matter at what stage it is. Who knew green bananas could be cooked and used in curry!?

And then check out this recipe for banana pudding. It actually uses bananas that are just barely ripe. The recipe creator, Hayley (www.domesticrebel.com) says “This truly is the very BEST banana pudding EVER! Rich and creamy yet light and fluffy and packed with amazing, fresh banana flavor in every mouthwatering bite! This is sure to become a crowd-pleaser and family fave!”

The Very BEST Banana Pudding
Ingredients:
2 1/2 cups heavy whipping cream
3/4 cup confectioners' sugar
1 teaspoon vanilla extract
1 (8-ounce) package cream cheese softened
1 (14-ounce) can sweetened condensed milk
1 (5-ounce) box instant banana pudding mix (just the dry powder)
1 cup 2% or whole milk
1 (11-ounce) box Nilla Wafers
8 (about) medium bananas sliced (make sure they're BARELY ripe - too ripe/soft and they'll brown faster and affect the pudding flavor)
Directions:
1. Lightly grease a 9x13 baking dish with cooking spray; set aside.
2. In the bowl of a stand mixer, add in the heavy whipping cream, confectioners' sugar and vanilla extract and, using the whisk attachment, whip until stiff peaks form, about 5-7 minutes. Remove the whipped cream to a separate medium bowl and set aside.
3. To the wiped out stand mixer bowl, add the cream cheese and, using the same whisk attachment, whip the cream cheese until fluffy, about 30 seconds. Add in the sweetened condensed milk and beat until smooth and no lumps of cream cheese remain, stopping to scrape the bottom and sides of the bowl as needed. Add in the dry pudding mix and mix well, then slowly stream in the milk and mix until fully combined.
4. Add 2/3 of the whipped cream to the pudding mixture and fold it in gently until fully combined and no whipped cream streaks remain. Set aside.
5. In your prepared pan, place an even layer of Nilla wafers and top with an even layer of sliced banana coins. Top with half of the pudding mixture and spread evenly. Repeat with another layer of Nilla wafers, followed by another layer of sliced banana coins, and the remaining pudding layer, spreading it evenly. Top with the remaining 1/3 of the whipped cream. Cover and refrigerate at least 8 hours or overnight.
6. Just before serving, crush any remaining Nilla wafers and sprinkle over the top. Store leftovers covered in the fridge, maximum 2 days.
NOTES
Remember, this recipe needs at least 8 hours to chill, so it can be made in advance. But because of bananas and their tendency to brown, it has a maximum of 2 days before I would throw it out. You cannot freeze this recipe as the pudding does not freeze well.
Cool Whip can be used to replace the whipped cream. If using Cool Whip, simply omit the heavy whipping cream, confectioners' sugar and vanilla extract and replace with one 12-ounce tub of thawed Cool Whip and proceed with the recipe as normal.
If you don't like/can't find Nilla Wafers®, shortbread cookies or Chessman cookies can be used in their place.
Recipe formatted with the Cook'n Recipe Software from DVO Enterprises.
 Alice Osborne
DVO Newsletter Contributor since 2006
Email the author! alice@dvo.com
Sources:
- www.healthline.com
- www.unsplash.com
- www.wikihow.com
- www.bakingmischief.com
- www.delish.com
- www.domesticrebel.com
