GOOD Gravy!
In fact, SUPER good gravy is what we’re after! With holiday fully upon us, this is one skill we all need to have. And Cindy, professional cook and recipe creator for the Land ‘O Lakes website (www.landolakes.com) says, “The…thought of making gravy can make the bravest cooks afraid as they think about preparing traditional meals for family and friends. Making gravy was always Mom’s job, and we didn’t have to worry about it, right?
“Let me assure you, the process of making gravy really isn’t hard. It just takes focus (no distractions allowed while you’re at the task) and a foolproof technique.”
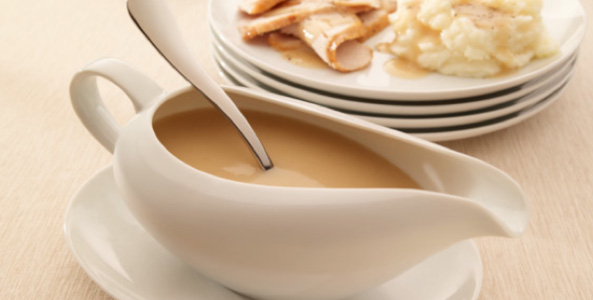
We all know a successful gravy is smooth and silky, not lumpy, and it doesn’t taste like uncooked flour. There are a number of ways to make gravy, but Cindy shares what she has found to be the above-mentioned foolproof method. Since the holidays typically feature turkey dinners, here is Cindy’s timely tutorial on how to turn out a superb turkey gravy:
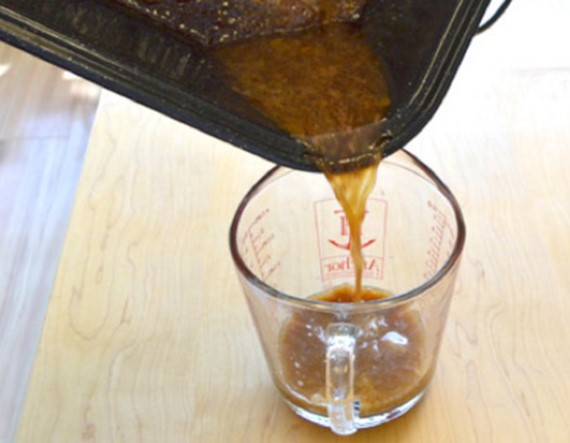
FIRST, REMOVE EXCESS FAT. After a turkey is roasted, the amount of remaining fat in the roasting pan can vary. Remove the turkey from the roasting pan. Pour leftover juices into a measuring cup, and reserve 3 tablespoons of fat and then discard the rest. Too much fat in the gravy makes the gravy greasy, and though fat adds flavor, it will not make for a smooth gravy texture.
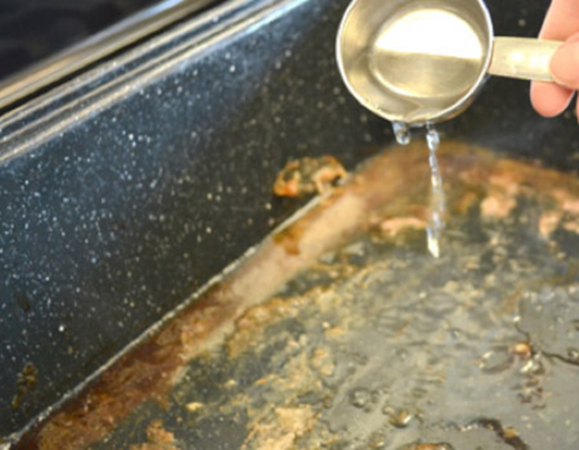
SECOND, DEGLAZE THE ROASTING PAN. To deglaze the pan, place the empty roaster on the stovetop over medium-high heat and add ¼ cup of water and the reserved 3 tablespoons of fat.
Stir constantly to loosen the brown bits on the bottom of the pan. The brown bits are treasures; they’re what gives the gravy such great flavor.
NEXT, ADD CHICKEN BROTH. You want enough liquid in the roasting pan to equal at least 3 cups. Heat the liquid mixture, it needs to be HOT!
Place 3 cups of pan juice and the fat mixture into a 3-quart saucepan and heat the mixture over medium heat until it comes to a full boil. The liquid needs to be very hot before thickening the gravy with flour.
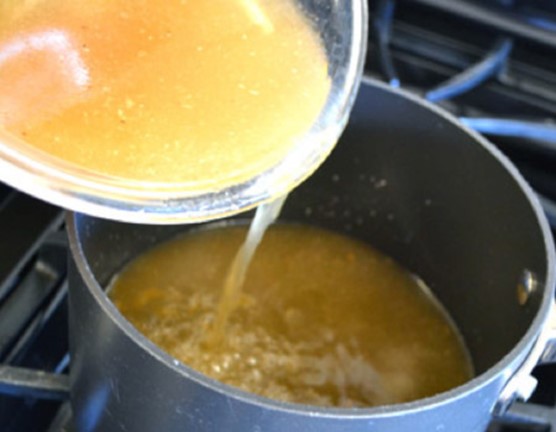
THEN, THICKEN THE LIQUID. This step is what turns it all into gravy. Combine ½ cup cold water and ½ cup flour in a container with a tight-fitting lid and shake to mix it. Cindy says if you use cold water for mixing with the flour, you’ll have no problem with lumps.
NEXT, USE A WHISK TO MIX THE FLOUR MIXTURE INTO THE BROTH MIXTURE. Pour the flour mixture into the hot liquid, whisking constantly. This part is very important! If you do not stir constantly, the flour mixture could create lumps, but for sure it will form a thick gel on the bottom of the mixture. Breaking up this thick gel is where lumps can come from.
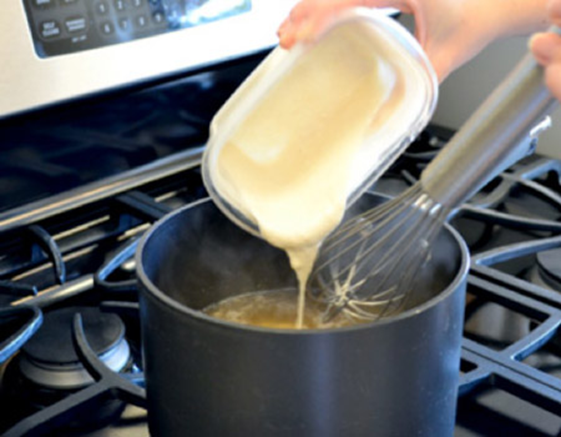
The whisk creates an even, consistent mixture that turns out smooth as well as thick. If lumps do form, and your whisk doesn’t break them up, you can bring in the big guns—an immersion blender (just pour all the gravy in to your blender and carefully whiz away). Or you can carefully pour the gravy from the pan into a strainer to remove the lumps.
FINISH BY BOILING THE GRAVY FOR 1 to 2 MINUTES. This step ensures the flour is thoroughly cooked. Finish by seasoning the gravy with salt and pepper to your liking. Voila! Your gravy is ready to serve, and ready for rave reviews. Mom would be proud!
I’ll close with the recipe referenced above by Cindy. My mother used this recipe throughout my life. Ahh, the memories!
drippings from roasted turkey
1/2 cup all-purpose flour
4 cups low-sodium chicken broth (or turkey or vegetable broth)
salt to taste
pepper to taste
giblets and neck of uncooked turkey (optional)
Directions:
Add Recipe to Cook'n

“Let me assure you, the process of making gravy really isn’t hard. It just takes focus (no distractions allowed while you’re at the task) and a foolproof technique.”
We all know a successful gravy is smooth and silky, not lumpy, and it doesn’t taste like uncooked flour. There are a number of ways to make gravy, but Cindy shares what she has found to be the above-mentioned foolproof method. Since the holidays typically feature turkey dinners, here is Cindy’s timely tutorial on how to turn out a superb turkey gravy:

FIRST, REMOVE EXCESS FAT. After a turkey is roasted, the amount of remaining fat in the roasting pan can vary. Remove the turkey from the roasting pan. Pour leftover juices into a measuring cup, and reserve 3 tablespoons of fat and then discard the rest. Too much fat in the gravy makes the gravy greasy, and though fat adds flavor, it will not make for a smooth gravy texture.

SECOND, DEGLAZE THE ROASTING PAN. To deglaze the pan, place the empty roaster on the stovetop over medium-high heat and add ¼ cup of water and the reserved 3 tablespoons of fat.
Stir constantly to loosen the brown bits on the bottom of the pan. The brown bits are treasures; they’re what gives the gravy such great flavor.

NEXT, ADD CHICKEN BROTH. You want enough liquid in the roasting pan to equal at least 3 cups. Heat the liquid mixture, it needs to be HOT!
Place 3 cups of pan juice and the fat mixture into a 3-quart saucepan and heat the mixture over medium heat until it comes to a full boil. The liquid needs to be very hot before thickening the gravy with flour.

THEN, THICKEN THE LIQUID. This step is what turns it all into gravy. Combine ½ cup cold water and ½ cup flour in a container with a tight-fitting lid and shake to mix it. Cindy says if you use cold water for mixing with the flour, you’ll have no problem with lumps.
NEXT, USE A WHISK TO MIX THE FLOUR MIXTURE INTO THE BROTH MIXTURE. Pour the flour mixture into the hot liquid, whisking constantly. This part is very important! If you do not stir constantly, the flour mixture could create lumps, but for sure it will form a thick gel on the bottom of the mixture. Breaking up this thick gel is where lumps can come from.

The whisk creates an even, consistent mixture that turns out smooth as well as thick. If lumps do form, and your whisk doesn’t break them up, you can bring in the big guns—an immersion blender (just pour all the gravy in to your blender and carefully whiz away). Or you can carefully pour the gravy from the pan into a strainer to remove the lumps.
FINISH BY BOILING THE GRAVY FOR 1 to 2 MINUTES. This step ensures the flour is thoroughly cooked. Finish by seasoning the gravy with salt and pepper to your liking. Voila! Your gravy is ready to serve, and ready for rave reviews. Mom would be proud!
I’ll close with the recipe referenced above by Cindy. My mother used this recipe throughout my life. Ahh, the memories!

Foolproof Turkey Gravy
Ingredients:
drippings from roasted turkey
1/2 cup all-purpose flour
4 cups low-sodium chicken broth (or turkey or vegetable broth)
salt to taste
pepper to taste
giblets and neck of uncooked turkey (optional)
Directions:
1. When you have taken your turkey out of the oven, pour the drippings (what’s left in the roasting pan after cooking the turkey. This includes fat that has melted and any bits of meat that have fallen off) from your turkey roasting pan into a large bowl. (Tip the pan away from your body and be careful not to burn yourself)!
2. Now let the drippings sit for a minute, allowing the fat to naturally separate from the rest of the drippings. You will notice that the fat will rise to the top, leaving the drippings and liquid on the bottom. Use a large spoon or ladle to skim (remove) most of the fat from the surface of the drippings.
3. To make the gravy, use a large sauce pan and add 1 cup of drippings to the pan.
4. Add ½ cup flour to the pan and whisk together until it makes a smooth paste. (At this point, you'll need to use a little of your own judgement. You want a pasty consistency. If yours seems a little greasy, add more flour).
5. When you have found the right consistency, whisk the mixture slowly over the heat as it begins to brown. You are creating a roux.
6. Once you get a nice golden brown color, add 4 cups of chicken broth and 1 additional cup of drippings.
7. Allow the gravy to cook, whisking constantly for about 5 to 8 minutes, or until thickened. Then add the giblet meat.
8. At this point, decide for yourself if you like the consistency of the gravy. If the gravy is too thick, add more drippings liquid (if you have it) or chicken broth. If gravy is too thin, cook for about 10 minutes. If it's still thin, add a cornstarch slurry (mix 1 tablespoon of cornstarch with 1 tablespoon of water and then add to the gravy). Continue heating until gravy thickens to desired consistency.
9. Once you’re happy with the consistency of your gravy, season with salt and pepper, to taste, and enjoy!
NOTES:
Store leftover gravy covered, in the refrigerator in a sealed container for 2 to 3 days.
To Make Ahead: Make gravy as directed and allow it to cool. Store covered, in the refrigerator for up to 2 days. To reheat, pour gravy into a saucepan and add a couple tablespoons of chicken broth or water to thin it (use your best judgement for how thin/thick you like it). Heat it on medium low heat until warmed through (about 15 minutes).
Recipe formatted with the Cook'n Recipe Software from DVO Enterprises.
 Alice Osborne
Weekly Newsletter Contributor since 2006
Email the author! alice@dvo.com
