How to Make the BEST SCONE You’ve Ever Had!
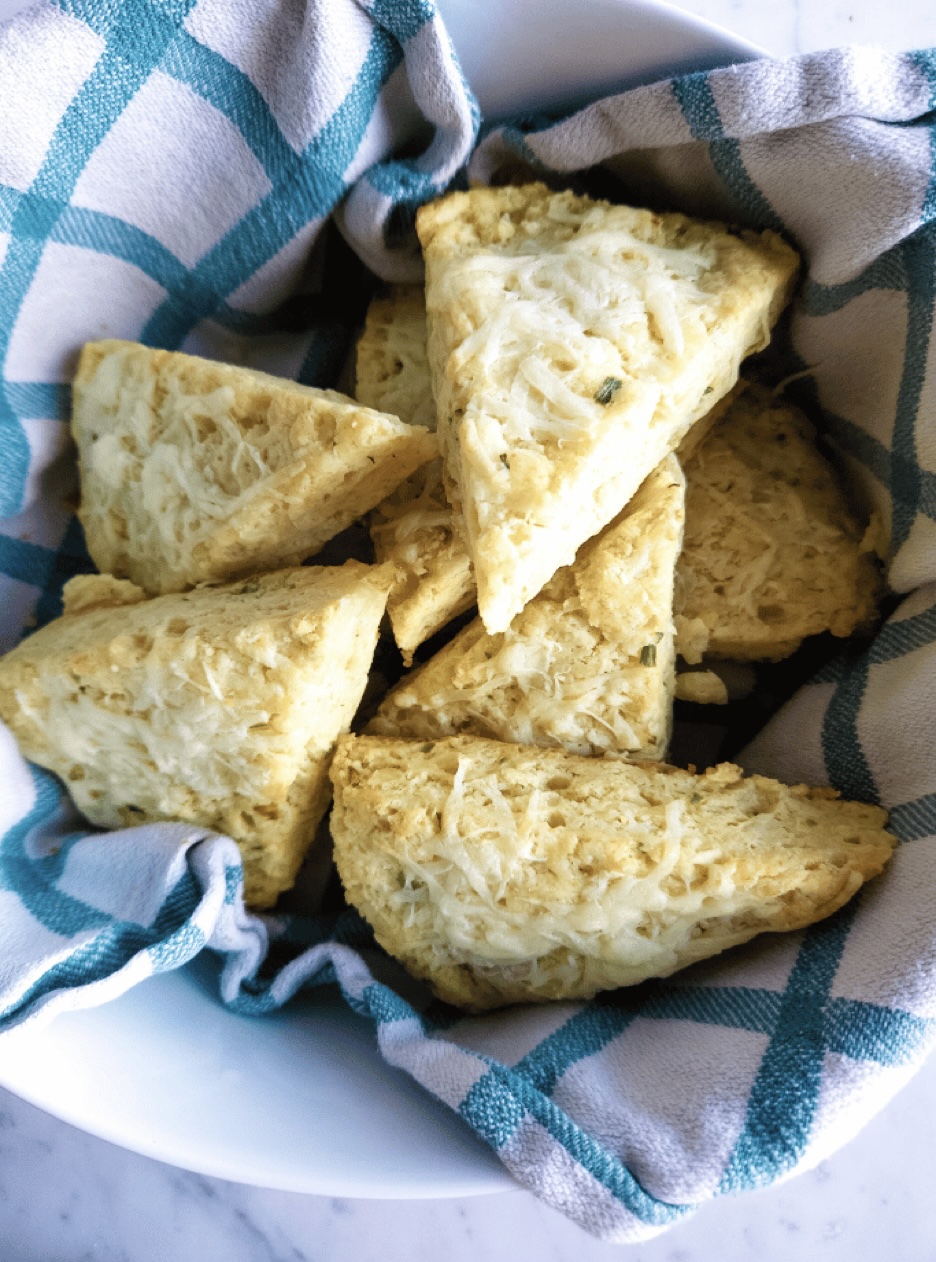
In the book of best breakfast foods, scones top the list. They’re humbly simple and uniquely delicious. The best scones have a crisp, slightly caramelized exterior and a tender, buttery, just-sweet interior. They can be dressed up with a glaze, studded with fruit or nuts, or gently spiced.
Don’t you love anything “simple?” If so, then read on for tips from professional bakers regarding how to make the best scone you’ve ever had.
First, every pro will tell you that for a better rise, start with COLD ingredients, and even cold tools.
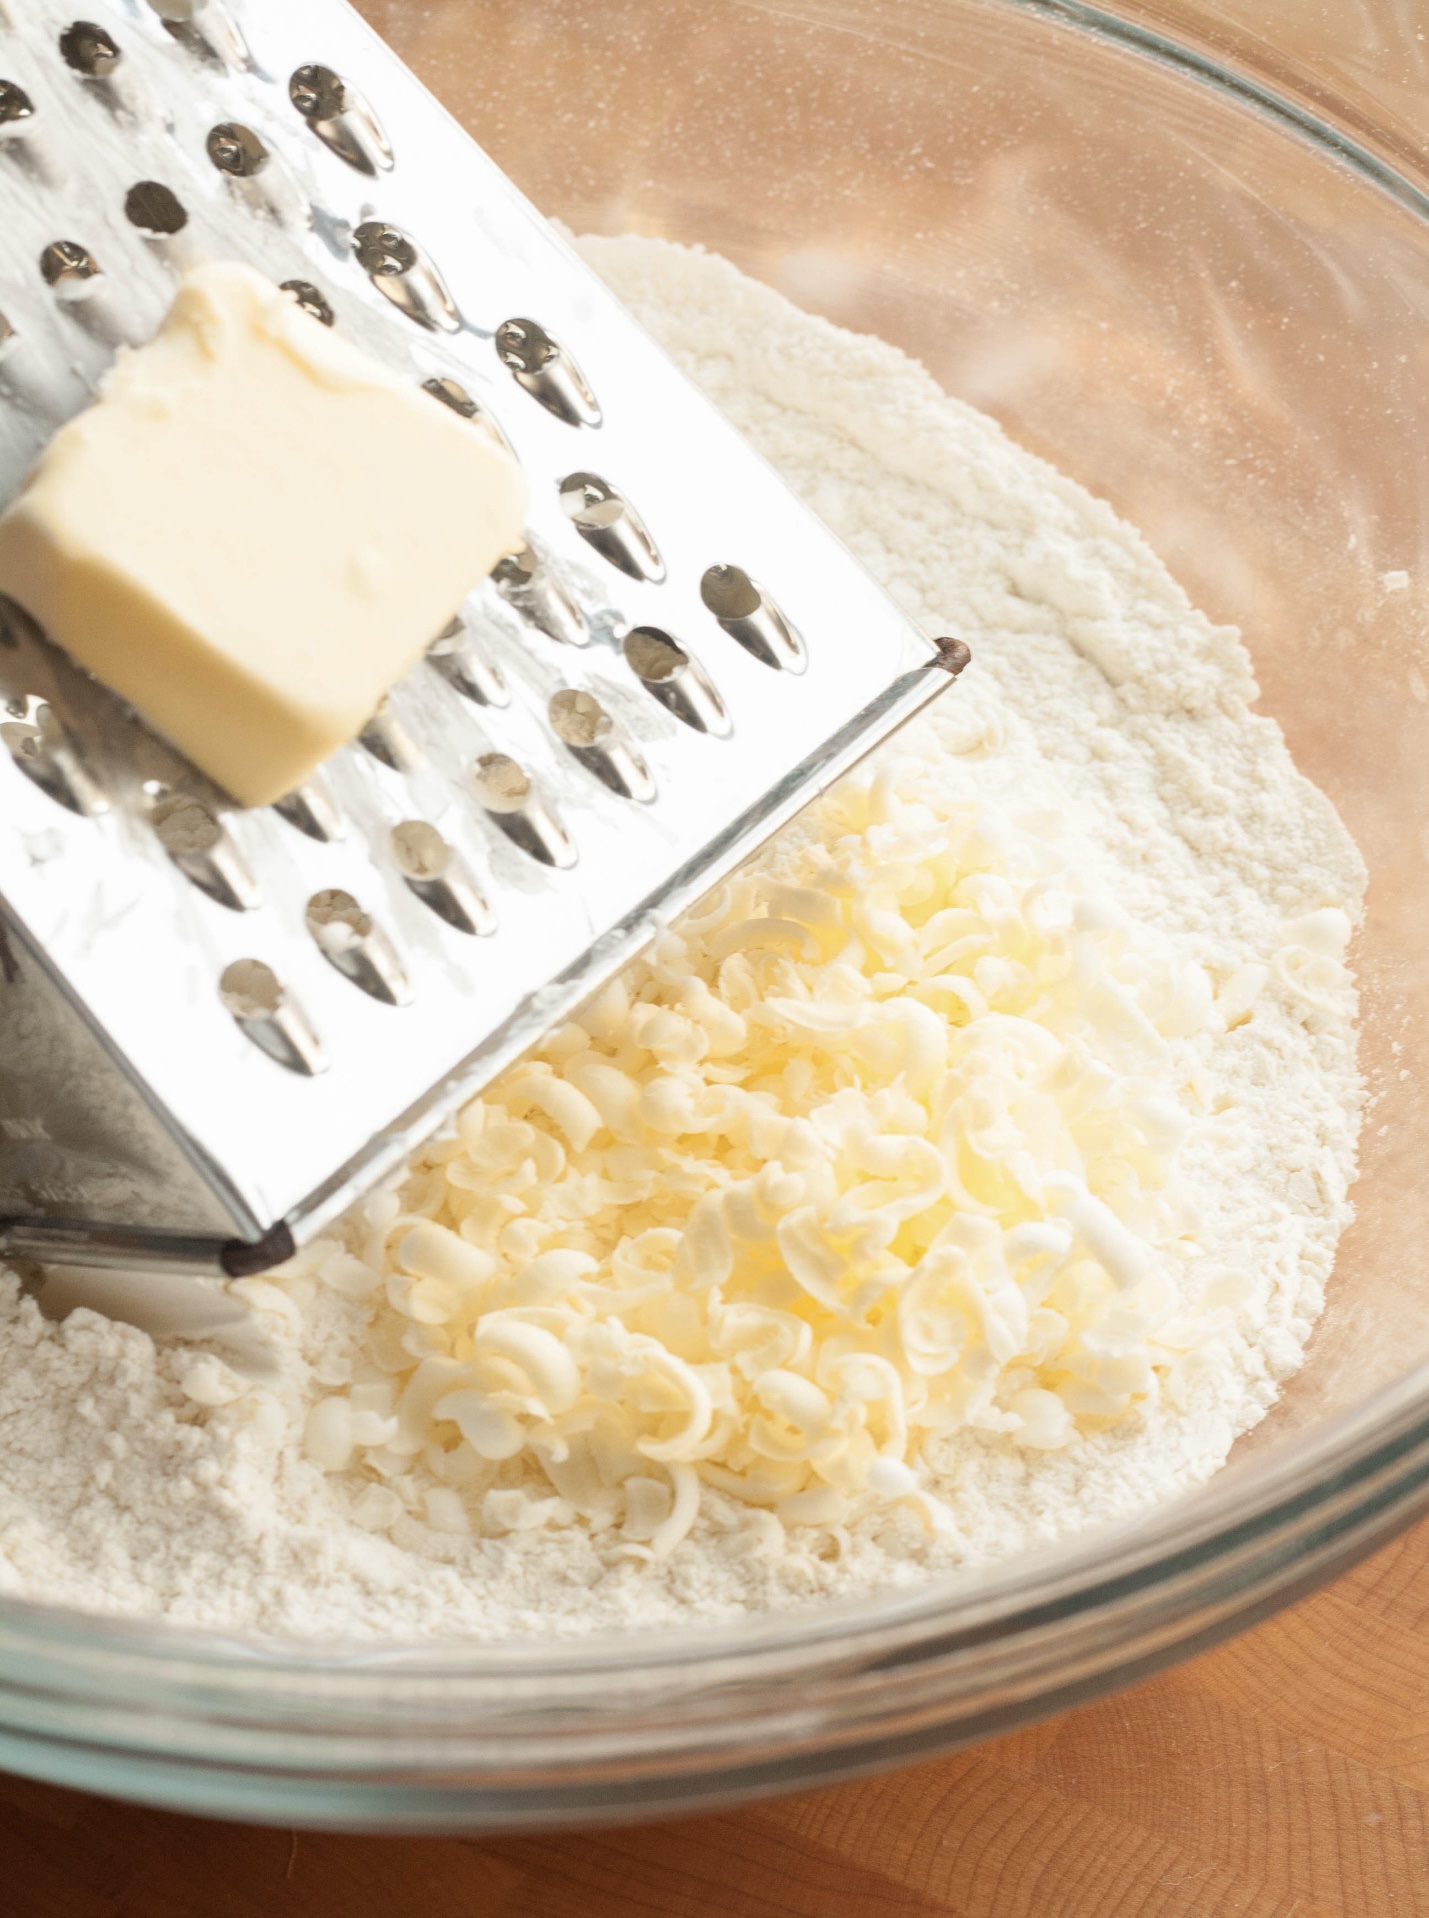
Begin with cold butter — the colder the better. Frozen butter is best. You can manage this if you shave it (which means your metal box shredder should be ice cold for this). I always shave my butter for scones, biscuits and pie crusts. (Don’t try it in a warm kitchen though…ask me how I know.) And for the lightest scones, opt for pastry flour. If you don’t have pastry flour on hand, you can easily make your own. This is exactly what’s in store-bought pastry flour and it’s perfect in all recipes where cake and pastry flour is required. In 3 simple steps:
Weigh out 125 grams (1 cup) of all-purpose flour in to a mixing bowl. Remove 6 grams (1 tablespoon) of the flour.
Add 6 grams (1 tablespoon) of corn starch.
Double sift to fully combine the ingredients.
Then mix your ingredients just until the dough comes together (in a pre-chilled bowl, of course). Be ultra careful not to over-do it. A pastry cutter is the ideal tool for this (once again, pre-chilled). Results should be lumpy.
If you're adding fruit, avoid juicy fruit, and rinse and dry it well. If using frozen fruit, and it’s individually frozen, there’s no need to thaw it. Fruit frozen in one big chunk, though, does need thawing, rinsing and draining.
Next, it’s time to shape the dough. Scone dough should be 1–2.5 cm (1/2–¾ in) thick. If the dough is too tall, the scones can lose their shape while baking. You can use your hands to flatten the dough, or you can use a rolling pin (using a light touch).
Depending on the desired shape, you can pat or roll the dough into different shapes—triangles are traditional, but large squares or circles work, too. If you happen to have a scone cutter, just be sure it’s pre-chilled (apologies for the redundancy, but chilling is crucial to making the BEST scone you’ve ever had).
If you do choose to cut rather than pat out your shapes, choose the cutter size carefully, as the scones expand while baking. When cutting, use a decisive motion and avoid twisting the cutter, which can impair the rise and cause the scones to lose their shape. Lightly dust the dough with flour before cutting to help you cut cleanly.
When placing them on your baking sheet, keep ‘em cozy, about one inch apart (if making separate wedges). If making round scones, consider baking them like cinnamon rolls, where they're actually touching, which will result in nice, soft sides.

Once shaped or cut, chill them before baking. (This is a good time to preheat the oven so the kitchen doesn't heat up while you make the dough.) Chilling before baking allows the gluten to relax and the butter to cool down again, which yields a tender and flaky texture.
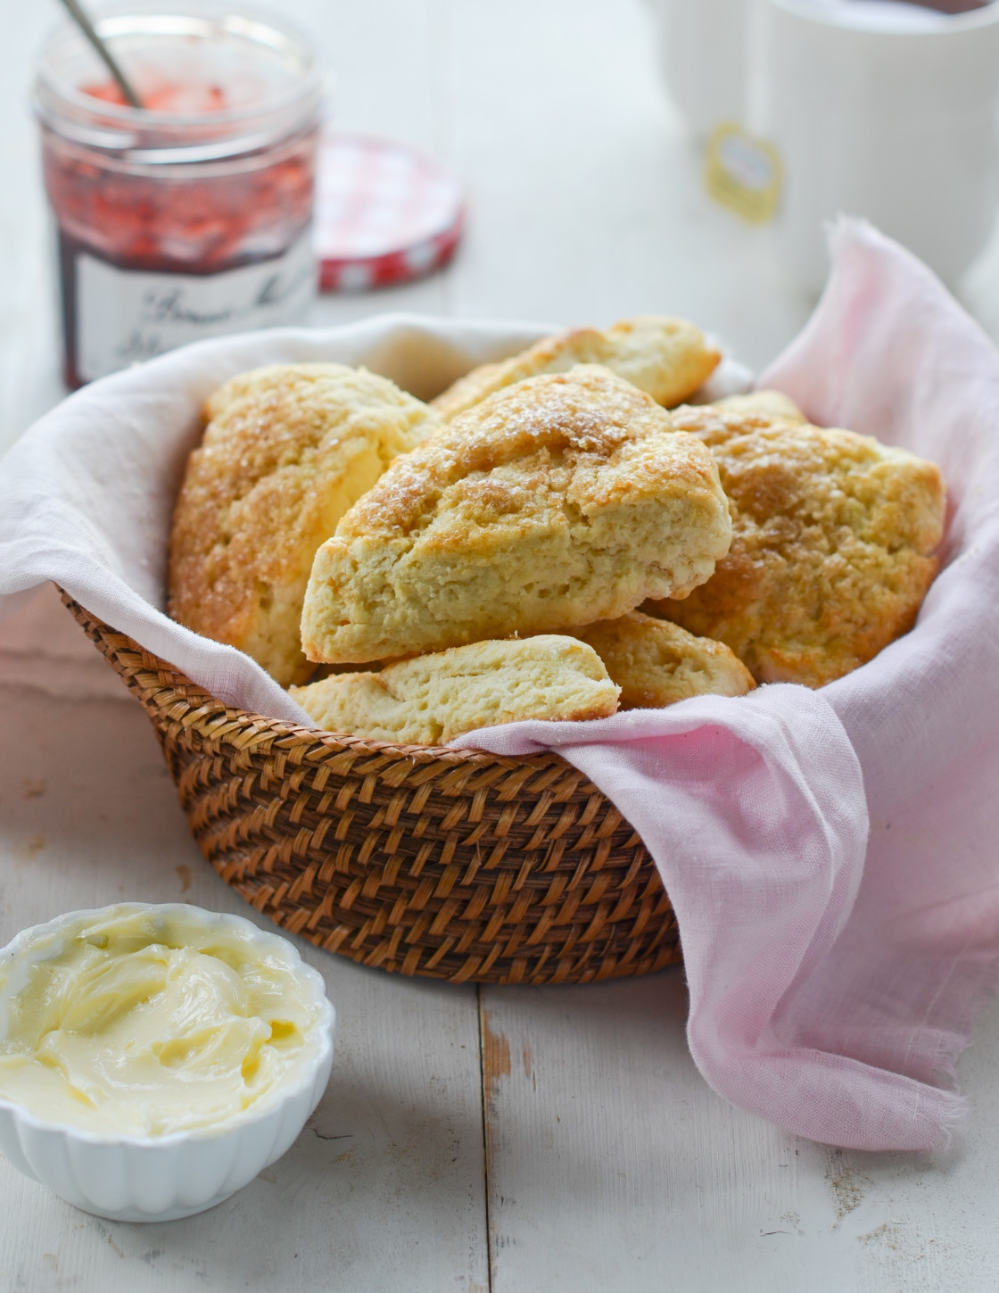
Finally, don't overbake them, and remember they're meant for clotted cream, butter, and jam. That said, here’s a hot tip: We discovered they’re also perfect for strawberry shortcake!
If the idea of scones interests you, here’s a wonderful recipe to get you started. I’ve tried many, and this is our absolute favorite. It’s from Jenn Segal (a classically trained chef and cookbook author), of www.onceuponachef.com. Jenn says, “Say goodbye to dry, crumbly scones—a secret ingredient makes these light, tender and buttery!”
Classic Scones
Yield: 8 scones
Ingredients:
DOUGH
2 cups pastry flour spooned into measuring cup and leveled-off
2 1/2 teaspoons baking powder
2 1/2 tablespoons sugar
3/4 teaspoon (scant) salt
1/2 cup COLD unsalted butter cut into Ω-inch pieces
2/3 - 3/4 cup heavy cream well chilled (do not substitute milk or light cream)
TOPPING
1 large egg beaten
1 tablespoon demerara sugar (also called raw sugar or turbinado; optional)
Directions:
In a large pre-chilled bowl, whisk together the flour, salt, baking powder and granulated sugar (using a pre-chilled whisk). Add the pieces of cold butter. Using your fingertips, rub the butter into the dry ingredients until the mixture resembles coarse crumbs with pea-size clumps of butter within.
In a small pre-chilled bowl or liquid measuring cup, whisk together ? cup heavy cream and the egg. Make a well in center of dry ingredients, then pour the cream/egg mixture in. Using a rubber spatula, mix until the dough comes together into a mass. It should be a bit sticky but not so wet that you can't handle it with your hands. If it seems dry, add the remaining 2 tablespoons of cream.
Dust a work surface lightly with flour, then dump the scone dough onto the surface; dust the dough with a bit of flour as well. Knead very gently a few times until the dough comes together into a ball. (Sprinkle more flour, little by little, if dough is too sticky to work with.) Press the dough into a flat circle about 7 inches in diameter and æ-inch thick, then use a sharp knife to cut into 8 even triangles. Transfer the wedges to a parchment paper-lined baking sheet. Brush lightly with the beaten egg and sprinkle with the demerara sugar, if using.
Cover scones with plastic wrap and place in refrigerator to chill while preheating the oven.
Preheat the oven to 425∞F and set an oven rack in the middle position.
Bake for 11 to 13 minutes, until the tops are lightly golden and firm to the touch. Serve warm from the oven.
Freezer-Friendly Instructions: To freeze before baking, place the raw scones on a baking sheet, let set in the freezer, then place in an airtight container and freeze for up to 3 months. Bake as needed directly from the freezer. (Allow 1 to 2 minutes longer in the oven.)
To freeze after baking, let the scones cool completely and store in an airtight container for up to 3 months.
Before serving pre-frozen baked scones, remove them from the container and let them come to room temperature. (NOTE: You will get the best results if you freeze BEFORE baking.)
Recipe formatted with the Cook'n Recipe Software from DVO Enterprises.
 Alice Osborne
Weekly Newsletter Contributor since 2006
Email the author! alice@dvo.com
Sources:
- www.milkglasshome.com
- www.thekitchn.com
- www.christinascucina.com
- www.quietbakingday.com
- www.onceuponachef.com