How To Get the Crispiest Pork Belly
If you haven’t tried a nice, crispy piece of pork belly, I’d dare say you haven’t fully experienced all the good things life has to offer. If you love bacon, you’re going to LOVE pork belly. It’s got all the good flavor you love in bacon, but it’s different because it’s got nice, tender pork flavor with an even crispier layer on top--if it is done properly.
Pork belly has really gathered steam in the last few years and has become popular enough for regular grocery stores all over America to stock it. Even though it has become pretty commonplace in the last few years, it has been around for much, much longer than that. It is a very common dish from China to Columbia and everywhere in between.
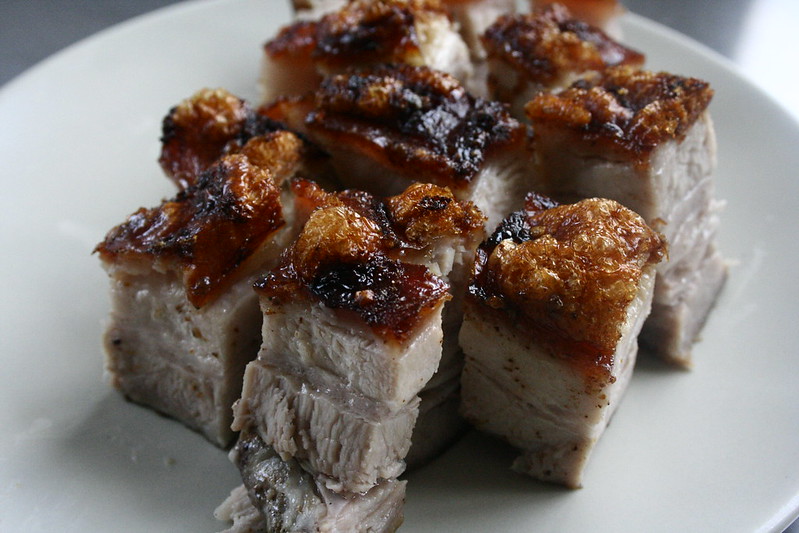
This is siu yuk, a popular dish in Cantonese cuisine.
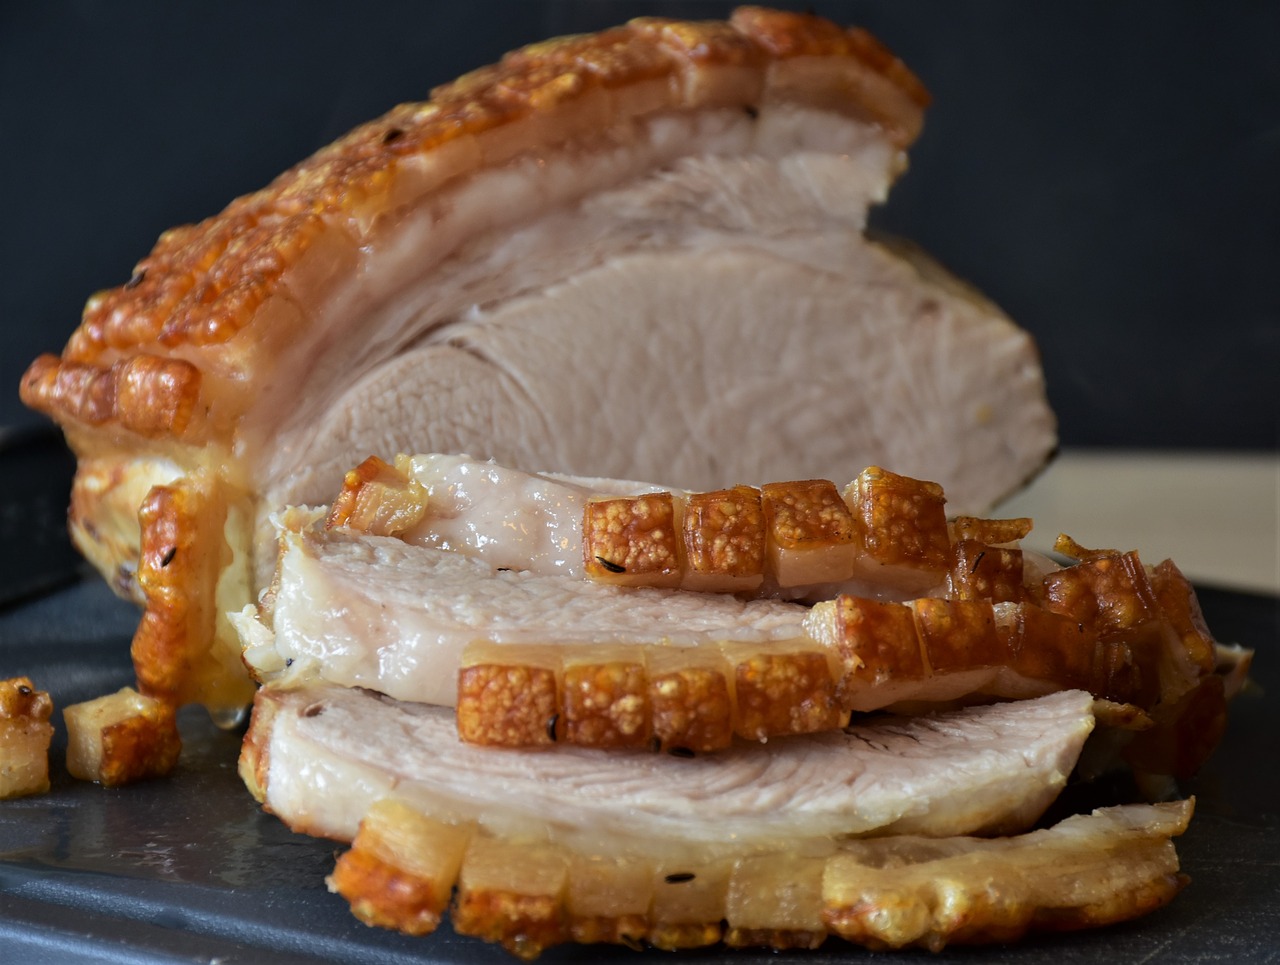
You probably already know that they cut the thin strips of bacon we know and love from the pork belly. This pork belly dish and recipe we are talking about today is specifically cut from the center where there are beautiful alternating layers of well-marbled meat and buttery fat. This pork will be roasted low and slow to not only dry and crisp the skin out, but also to make it super tender by transforming the tough collagen to gelatin, all while keeping the meat juicy. Frying the pork belly after roasting it really puffs up the skin and makes it very crispy.
The recipe we are using today comes from America’s Test Kitchen and they shared some really helpful tips in their video on how to make it taste perfect every time and get the crispiest skin possible.
Pork belly has really gathered steam in the last few years and has become popular enough for regular grocery stores all over America to stock it. Even though it has become pretty commonplace in the last few years, it has been around for much, much longer than that. It is a very common dish from China to Columbia and everywhere in between.
This is siu yuk, a popular dish in Cantonese cuisine.
You probably already know that they cut the thin strips of bacon we know and love from the pork belly. This pork belly dish and recipe we are talking about today is specifically cut from the center where there are beautiful alternating layers of well-marbled meat and buttery fat. This pork will be roasted low and slow to not only dry and crisp the skin out, but also to make it super tender by transforming the tough collagen to gelatin, all while keeping the meat juicy. Frying the pork belly after roasting it really puffs up the skin and makes it very crispy.
The recipe we are using today comes from America’s Test Kitchen and they shared some really helpful tips in their video on how to make it taste perfect every time and get the crispiest skin possible.
- Buy it with the skin on. You can buy pork belly with or without the skin on and in order to really achieve that crispy layer on top that you want, you want to buy it with the skin on.
- Buy about a 3 pound center cut pork belly that is 1 ½ inch thick and has even layers of well-marbled meat and fat.
- Cut it into thirds and score the top of the pork belly about every half inch through that top layer of skin to make it easy when it’s time to slice it up and serve it.
- Lay your meat skin side down and season the three fleshy sides (all the sides except the skin) liberally with brown sugar and kosher salt. This helps to not only season the meat, but also to keep the moisture in. Then flip them and with the skin side up, place them in a glass 9x13 baking dish and season the skin, which is now on top, with kosher salt only so that it doesn’t burn in the oven from the sugar.
- To really achieve the most dry, crispy skin you can, you want to try and dry it out and get as much moisture out as possible. To do this, you will let it dry out in the fridge uncovered for anywhere from 12 to 24 hours.
- Roast it low and slow in the oven to keep the pork tender and break down that collagen. You will cook it at 250 degrees F for about 3 to 3 ½ hours, or until the center reaches 195 degrees F.
- Finally, you will fry only the side with the skin on the stove with the leftover fat from the pan to crisp the skin before serving. You will actually put it into the cold pan with oil to achieve the desired result. You will shallow fry it for about 6-10 minutes or until there are little golden puffs all over the top layer and it is crispy and golden.
- Let it rest 5 minutes before serving. Here is the recipe for America’s Test Kitchen’s crispy slow-roasted pork belly with a lovely South Carolina inspired spicy mustard sauce. You will love the combination of all these textures and flavors.
- www.needpix.com
- www.sharefamilydinner.com
- www.americastestkitchen.com
Crispy Slow-Roasted Pork Belly
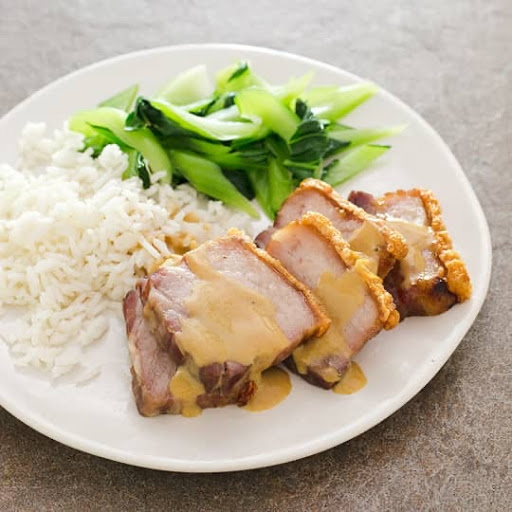
Cure and smoke pork belly and you’ve got bacon. Roast the belly instead and you’ve got the ultimate pork entre?e—provided the meat is tender and the skin stunningly crisp. Recipe Type: Roasts, Main Courses
Yield: Serves 8 to 10
Serving size: 9
Calories per serving: 48
Ingredients:
Serving size: 9
Calories per serving: 48
pork
1 (3 pound) skin-on center-cut pork belly, about 1 1/2 inches thick
kosher salt
2 tablespoons packed dark brown sugar
vegetable oil
SPICY MUSTARD SAUCE
2/3 cup Dijon style mustard
1/3 cup apple cider vinegar
1/4 cup packed dark brown sugar
1 tablespoon hot sauce
1 teaspoon Worcestershire sauce
Directions:
Using sharp chef's knife, sliced pork belly lengthwise into three strips, about 2 inches wide, then make ¼-inch-deep Crosswise cuts through skin and into fat spaced ½ inch apart. Combine 2 tablespoons each salt and brown sugar in small bowl. Rub salt mixture into bottom and sides of pork belly (do not rub into skin). Seasoned skin of each strip evenly with half teaspoon salt. Place pork belly, skin side up, in 9 x 13“ baking dish and refrigerate, uncovered for at least 12 hours or up to 24 hours.
Adjust oven rack to middle position and heat to 250°F. Transfer pork belly, skin side up, to lightly greased wire rack set in rimmed baking sheet. Roast pork belly until meat registers 195° and paring knife inserted into meet meets little resistance, 3 to 3 1/2 hours, rotating sheet halfway through roasting.
Transfer pork belly, skin side up, to large plate. (Pork belly can be held at room temperature for up to one hour.) Pour fat from sheets into one cup liquid measuring cup. Add vegetable oil as needed to equal one cup and transfer to 12 inch skillet. Arrange pork belly, skin side down, in skillet (strips can be sliced in half crosswise if skillet won’t fit strips whole) and place over medium heat until bubbles form around pork belly. Continue to fry, tilting skillet occasionally to even out hotspots, until skinny puffs, crisps, and turns golden, 6 to 10 minutes. Transfer pork belly, skin side up, to The Carving Board and let rest for five minutes. Flip pork belly on its side and slice 1/2 inch thick (being sure to slice through original score marks). Re-invert slices and serve with spicy mustard sauce.
Source:
www.americastestkitchen.com
Recipe formatted with the Cook'n Recipe Software from DVO Enterprises.
Sources:
blog comments powered by Disqus
 Mary Richardson
Weekly Newsletter Contributor since 2014
Email the author! mary@dvo.com