SPROUTING: It’s Wise to Know How!
Sprouts are one of the easiest foods you can grow indoors. They require barely any space and need no special equipment. And you don’t even need a sunny window! Sprouts are a veggie that everyone can (and should) grow.
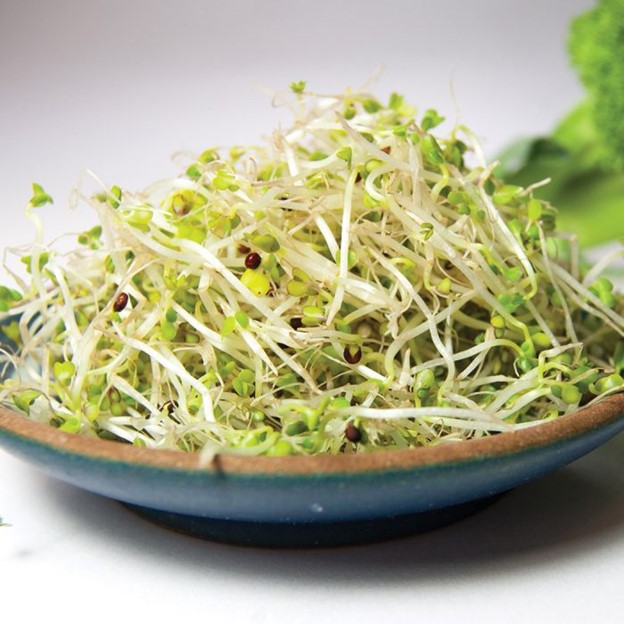
Besides being an easy, cheap, and tasty vegetable anyone can grow, sprouting also provides some sound nutritional benefits.
First, sprouted legumes, grains, and seeds are much easier to digest (the anti-nutrients common in these are broken down). You might be pleasantly surprised that sprouted beans or grains don’t bother your body. Also, sprouting increases vitamin and fiber content.
Lastly, it’s wise to know how to sprout. This skill will protect and maintain your immune system should there ever be a reason you couldn’t get fresh produce at the store or be unable to garden for any reason. Thus, I hope you’ll read on with deep interest!

I know there has been some worry about sprouting safety, due to outbreaks of salmonella and e.coli associated with sprouts from the grocery store. It’s because the warm humid environment that sprouts grow in is also the prime climate for bacteria to spread. In large-scale commercial operations, it’s almost impossible to keep the environment clear from all types of pathogens.
But the chance of getting a food-borne illness with sprouts grown at home is greatly diminished. You control the seeds you use, if your sprouting jar is clean or not, how much air circulation your sprouts get, and who touches the seeds (and if they wash their hands first). And you control how long the sprouts stay in the jar before being rinsed.
With that worry put to rest, let’s talk about sprouting WHATs and HOWs. You can sprout almost any legume, seed, or nut. There are a few exceptions—not because they won’t grow a sprout, but because the effort required to get it “right” isn’t really worth it or because they aren’t good for you.

For instance, chia seeds, flax seeds, and other mucilaginous seeds (those that get gelatinous) are tricky to sprout properly. You definitely can do it, but I generally just avoid it because there are so many other seeds that are much easier to sprout.
Also, avoid sprouting kidney beans for raw eating. They contain a toxin that causes nausea, vomiting, and diarrhea. But if you do choose to sprout them, be sure to boil the finished sprouts for at least 10 minutes before eating them.
The folks at www.wholefully.com share good instructions on how to get started.
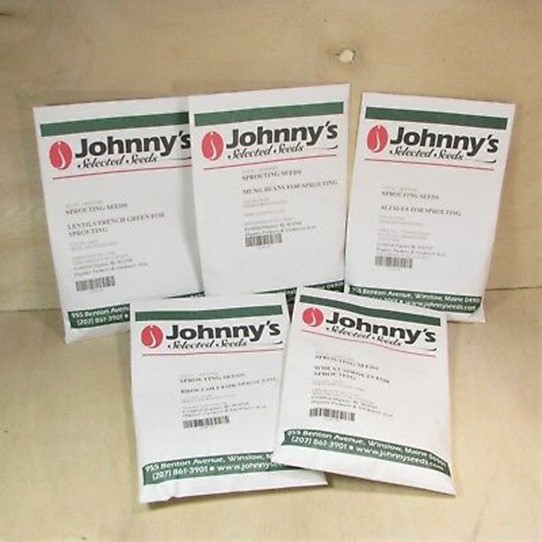
First, you want to buy sprouting-specific seeds because they’re tested and verified to be free of e.coli and salmonella. Growers of sprouting-specific seeds take great care to make sure the seeds they sell are very clean—meaning they are free of harmful bacteria and other pathogens that can thrive in the sprouting environment.
Next, look to health food stores and online for quality seeds. Johnny’s Seeds, Sprout People, and True Leaf Market are three reliable online sources. The chief concern is germination rates and how long the seeds stay viable. You know you’re buying from a good company if their seeds will still sprout after two or three years.
Finally, give it a try. The process is a breeze. Here’s what you do:
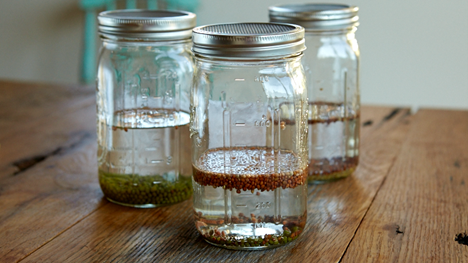
1: SOAK SEEDS. While different seeds soak up different amounts of water, a good rule of thumb is to use three parts water to one part seed. The amount to soak depends on the seed, the size of your container, and how much sprouts you want in the end. Here’s my favorite chart to guide you:
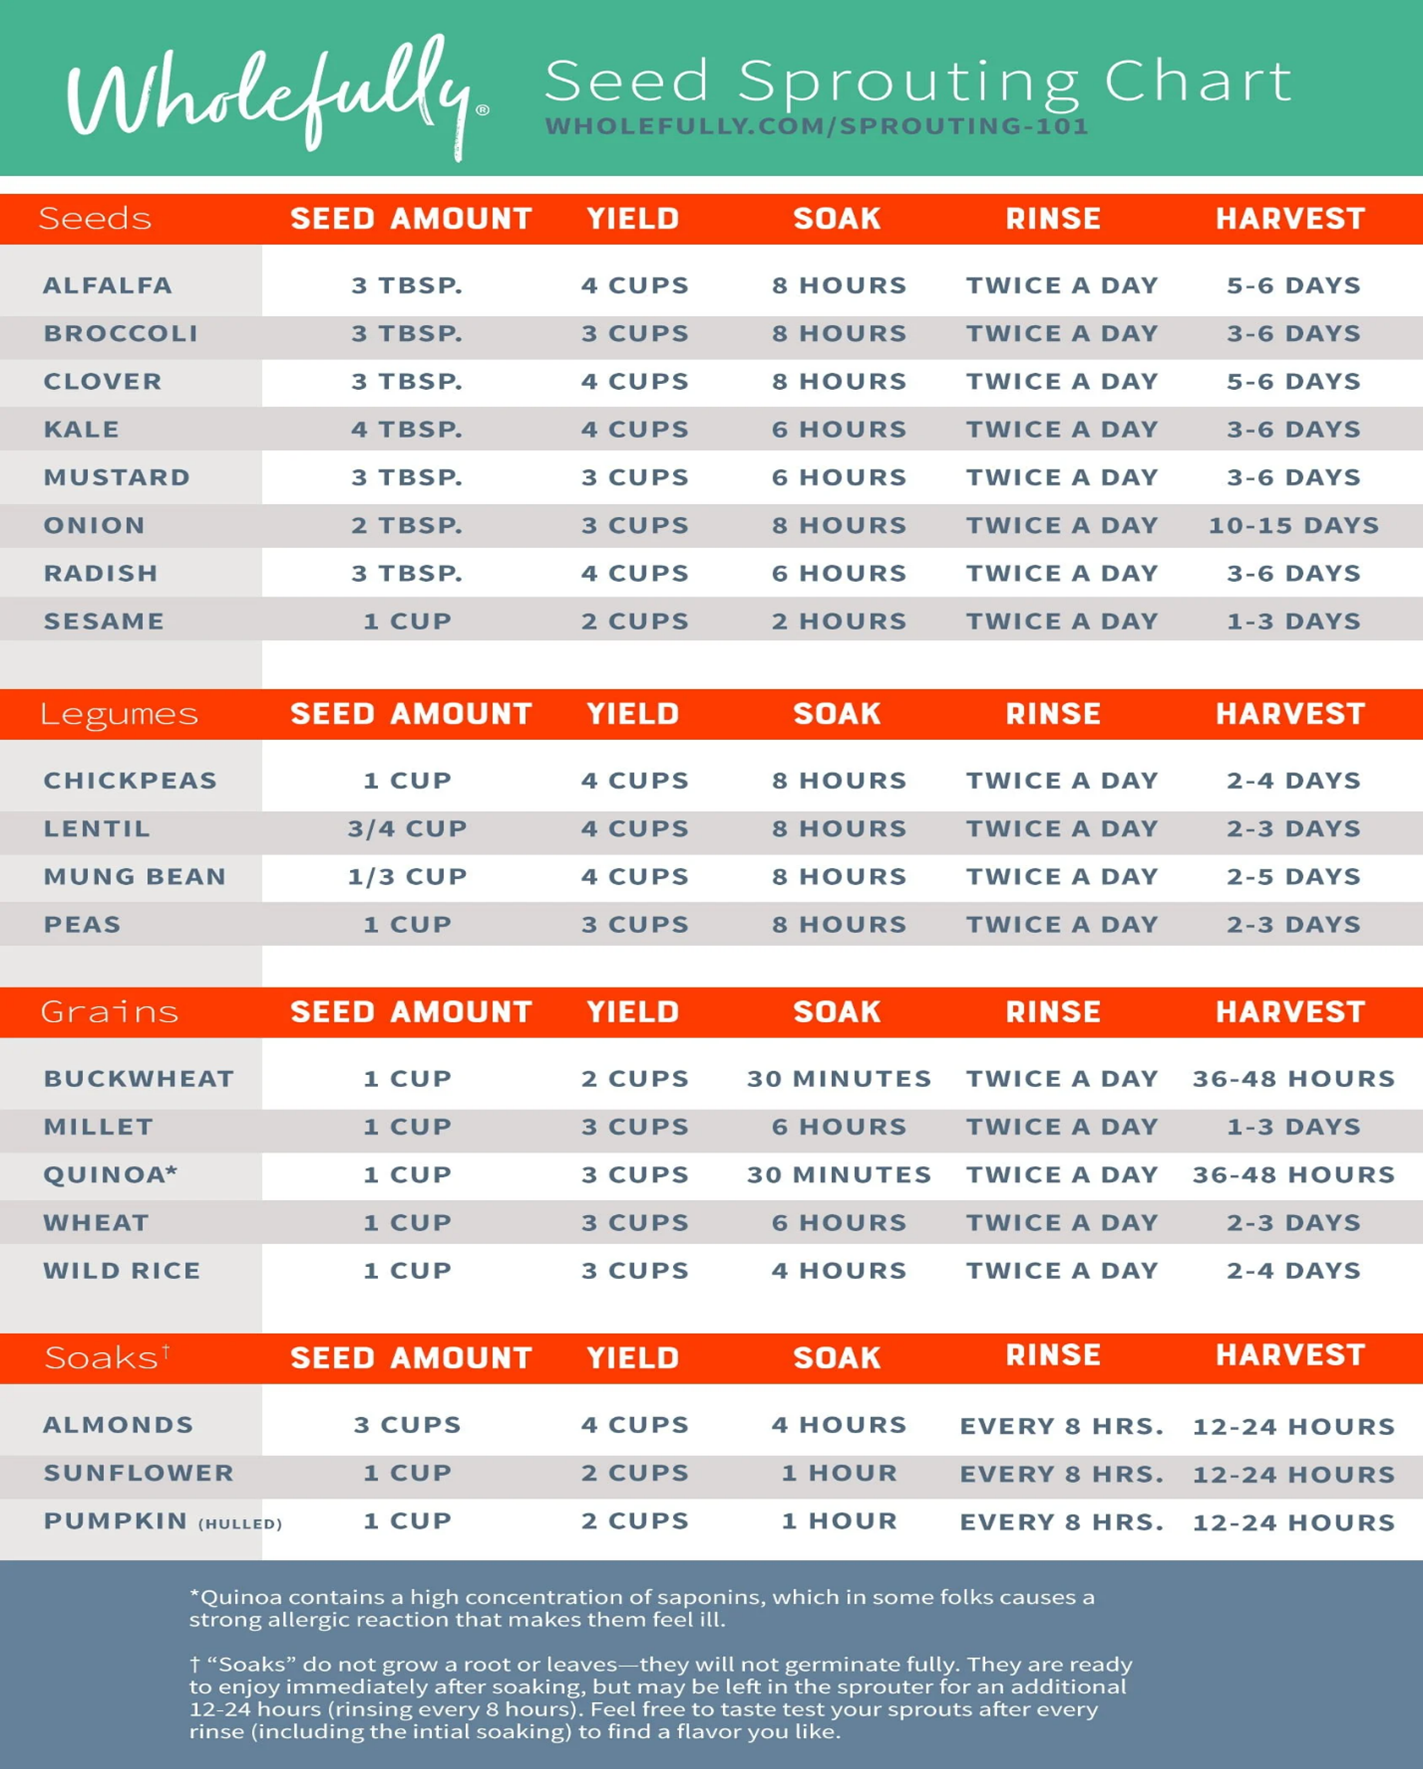
Place seeds in a clean canning jar, cover with cool water, and stir to make sure all seeds are wet. You can leave the jar open or you can cover it with either a sprouter lid on top of the jar or a piece of cheesecloth or muslin, secured with a rubber band. Set it aside to soak for the listed amount of time.
Note: you don’t really need to stress about soaking precisely what’s listed in the chart. You won’t mess your sprouts up if you soak for ten hours instead of eight.
2: DRAIN AND RINSE. Once soaking time is up, drain them well. If you have a sprouter lid, just tip the whole jar over the sink and let the water flow out. If using a cloth, remove it and place a fine mesh sieve over top of the jar. Invert it over the sink and let drain.
Then add more fresh, cool water to the jar, swirl it around a little bit, and rinse out that water. Be sure to shake out as much water as possible. Once they’re rinsed, turn the jar a few times so as many seeds as possible stick to the jar sides. This tends to increase the germination rate. Prop the jar upside-down in a bowl, like so:
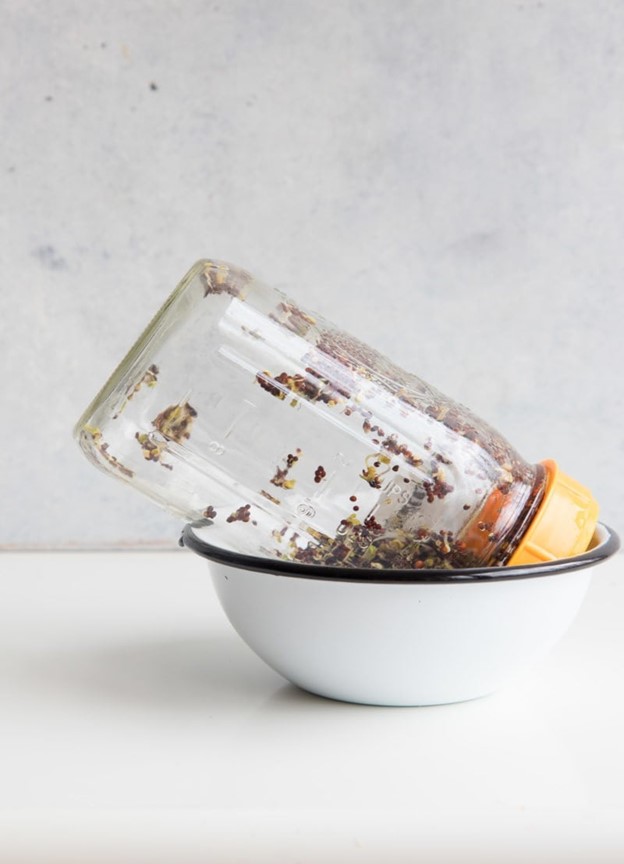
Be sure to keep them draining nicely; set the jar and bowl in an out-of-the-way-but-not-forgettable spot. They don’t need light, they do need to be able to breathe. Setting them on your kitchen counter is fine.
3: RINSE, DRAIN, REPEAT. Now simply visit your sprouts twice a day (for most sprouts) and rinse them with fresh, cool water, drain, and prop back up in the bowl (pour out the water that collected in the bowl, also).
For most seeds, you’ll start to see tiny sprouts within a day or so. You can harvest and eat your sprouts at any stage, but to get the most vitamin and mineral benefit, wait until they’re ½ to 2” long. Continue rinsing and draining until they’re the length you want.
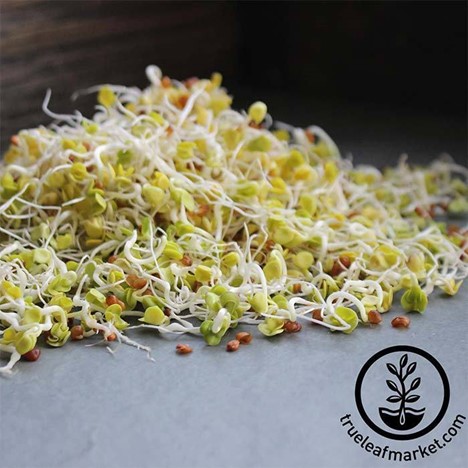
4: HARVEST AND USE. When ready to harvest, give your sprouts one final rinse, drain well, then remove the jar lid and dump all the sprouts out onto a clean, absorbent kitchen towel. Spread them all out onto one layer and let them air dry for 30-60 minutes before storing.
To store, line a glass food storage container with a clean tea towel (or paper towels) and fill with your sprouts. Wrap the towel over the sprouts and cover. Extra moisture is the enemy of sprouts (and herbs, lettuces, and other greens). Store in the fridge for up to a week.
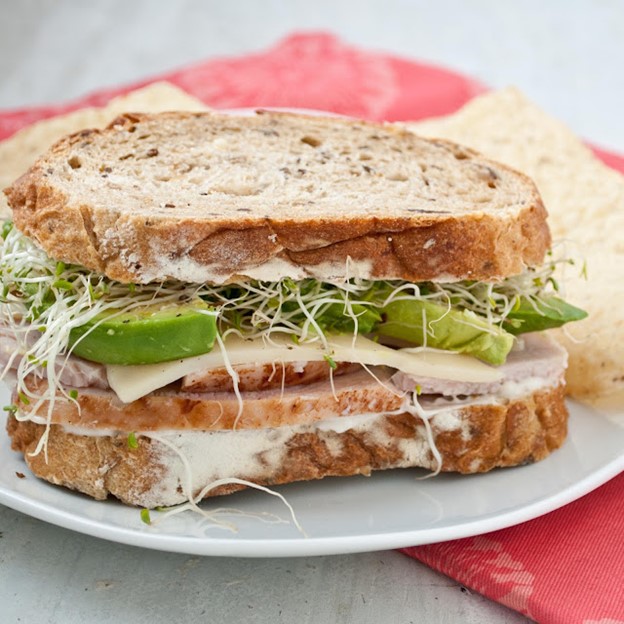
They’re delicious on sandwiches, in wraps, and in salads. Bean sprouts are great in stir fries, frittatas, and scrambles. The possibilities are endless!
5: RINSE AWAY HULLS (optional). It’s not necessary, but some people like to rinse away the hulls (the outer seed coatings on sprouts) once they’re finished. A salad spinner works well for this.

Besides being an easy, cheap, and tasty vegetable anyone can grow, sprouting also provides some sound nutritional benefits.
First, sprouted legumes, grains, and seeds are much easier to digest (the anti-nutrients common in these are broken down). You might be pleasantly surprised that sprouted beans or grains don’t bother your body. Also, sprouting increases vitamin and fiber content.
Lastly, it’s wise to know how to sprout. This skill will protect and maintain your immune system should there ever be a reason you couldn’t get fresh produce at the store or be unable to garden for any reason. Thus, I hope you’ll read on with deep interest!

I know there has been some worry about sprouting safety, due to outbreaks of salmonella and e.coli associated with sprouts from the grocery store. It’s because the warm humid environment that sprouts grow in is also the prime climate for bacteria to spread. In large-scale commercial operations, it’s almost impossible to keep the environment clear from all types of pathogens.
But the chance of getting a food-borne illness with sprouts grown at home is greatly diminished. You control the seeds you use, if your sprouting jar is clean or not, how much air circulation your sprouts get, and who touches the seeds (and if they wash their hands first). And you control how long the sprouts stay in the jar before being rinsed.
With that worry put to rest, let’s talk about sprouting WHATs and HOWs. You can sprout almost any legume, seed, or nut. There are a few exceptions—not because they won’t grow a sprout, but because the effort required to get it “right” isn’t really worth it or because they aren’t good for you.

For instance, chia seeds, flax seeds, and other mucilaginous seeds (those that get gelatinous) are tricky to sprout properly. You definitely can do it, but I generally just avoid it because there are so many other seeds that are much easier to sprout.
Also, avoid sprouting kidney beans for raw eating. They contain a toxin that causes nausea, vomiting, and diarrhea. But if you do choose to sprout them, be sure to boil the finished sprouts for at least 10 minutes before eating them.
The folks at www.wholefully.com share good instructions on how to get started.

First, you want to buy sprouting-specific seeds because they’re tested and verified to be free of e.coli and salmonella. Growers of sprouting-specific seeds take great care to make sure the seeds they sell are very clean—meaning they are free of harmful bacteria and other pathogens that can thrive in the sprouting environment.
Next, look to health food stores and online for quality seeds. Johnny’s Seeds, Sprout People, and True Leaf Market are three reliable online sources. The chief concern is germination rates and how long the seeds stay viable. You know you’re buying from a good company if their seeds will still sprout after two or three years.
Finally, give it a try. The process is a breeze. Here’s what you do:

1: SOAK SEEDS. While different seeds soak up different amounts of water, a good rule of thumb is to use three parts water to one part seed. The amount to soak depends on the seed, the size of your container, and how much sprouts you want in the end. Here’s my favorite chart to guide you:

Place seeds in a clean canning jar, cover with cool water, and stir to make sure all seeds are wet. You can leave the jar open or you can cover it with either a sprouter lid on top of the jar or a piece of cheesecloth or muslin, secured with a rubber band. Set it aside to soak for the listed amount of time.
Note: you don’t really need to stress about soaking precisely what’s listed in the chart. You won’t mess your sprouts up if you soak for ten hours instead of eight.
2: DRAIN AND RINSE. Once soaking time is up, drain them well. If you have a sprouter lid, just tip the whole jar over the sink and let the water flow out. If using a cloth, remove it and place a fine mesh sieve over top of the jar. Invert it over the sink and let drain.
Then add more fresh, cool water to the jar, swirl it around a little bit, and rinse out that water. Be sure to shake out as much water as possible. Once they’re rinsed, turn the jar a few times so as many seeds as possible stick to the jar sides. This tends to increase the germination rate. Prop the jar upside-down in a bowl, like so:

Be sure to keep them draining nicely; set the jar and bowl in an out-of-the-way-but-not-forgettable spot. They don’t need light, they do need to be able to breathe. Setting them on your kitchen counter is fine.
3: RINSE, DRAIN, REPEAT. Now simply visit your sprouts twice a day (for most sprouts) and rinse them with fresh, cool water, drain, and prop back up in the bowl (pour out the water that collected in the bowl, also).
For most seeds, you’ll start to see tiny sprouts within a day or so. You can harvest and eat your sprouts at any stage, but to get the most vitamin and mineral benefit, wait until they’re ½ to 2” long. Continue rinsing and draining until they’re the length you want.

4: HARVEST AND USE. When ready to harvest, give your sprouts one final rinse, drain well, then remove the jar lid and dump all the sprouts out onto a clean, absorbent kitchen towel. Spread them all out onto one layer and let them air dry for 30-60 minutes before storing.
To store, line a glass food storage container with a clean tea towel (or paper towels) and fill with your sprouts. Wrap the towel over the sprouts and cover. Extra moisture is the enemy of sprouts (and herbs, lettuces, and other greens). Store in the fridge for up to a week.
They’re delicious on sandwiches, in wraps, and in salads. Bean sprouts are great in stir fries, frittatas, and scrambles. The possibilities are endless!

5: RINSE AWAY HULLS (optional). It’s not necessary, but some people like to rinse away the hulls (the outer seed coatings on sprouts) once they’re finished. A salad spinner works well for this.
 Alice Osborne
Weekly Newsletter Contributor since 2006
Email the author! alice@dvo.com
