THE Secret to Adding Incredibleness to Just About Everything!
On occasion I’ve mentioned my son, Paul, who is a chef in Jackson, WY. I give Paul full credit for much of what I know about food prep and recipe development. This talented son is a wealth of knowledge and inspiration.

One of the things I’ve learned from him is why I should always keep a jar of leftover bacon grease on hand. This time-honored chef’s trick for replacing cooking oil and adding amazing flavor to vegetables, beans, dressings, and eggs is one that’s been passed down by generations of grandmothers. Paul says it’s THE secret to incredible mashed potatoes, roasted veggies, certain chowders and stews, and…well, he wouldn’t say more than that. But he and other professional chefs swear by it, for very good reasons.
After years of following his advice, I can confidently say bacon grease is in fact, THE secret to so many cooking successes! I like to cook a lot of bacon at a time, so I opt for baking it in the oven. I’ve found it’s less messy this way, and this method gives a consistent color to the bacon and leaves the grease nice and clean. I bake it at 400ºF for 18 to 20 minutes on a backing rack over a sheet pan. Once the pan is cool enough to handle, I collect the grease from the pan.
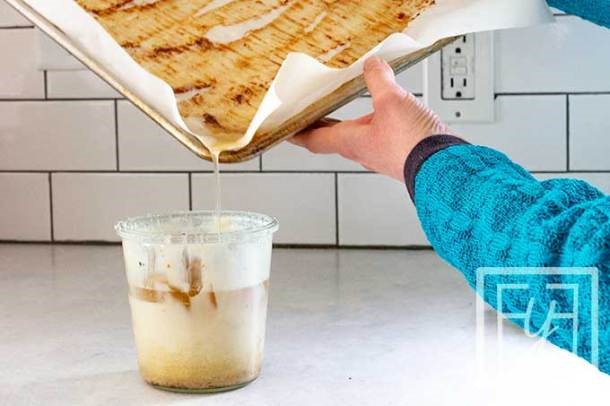
Keeping your grease free of bacon bits helps it to stay fresh for longer and improves the taste of your future dishes, so straining is key. You’ll want to use a fine mesh strainer over a heat safe bowl (perhaps a spouted glass measuring cup). You can also pour the grease through a coffee filter or cheesecloth. Pour slightly cooled grease through the strainer, using a heat-proof spatula to capture all of that bacony goodness.
Though generations of grandmas have kept bacon grease on the counter, food scientists recommend storing it in the refrigerator or freezer. A common caution I kept seeing in my research was: "It's best to not keep the bacon grease at room temperature because any microparticles of the bacon can cause the grease to go rancid."
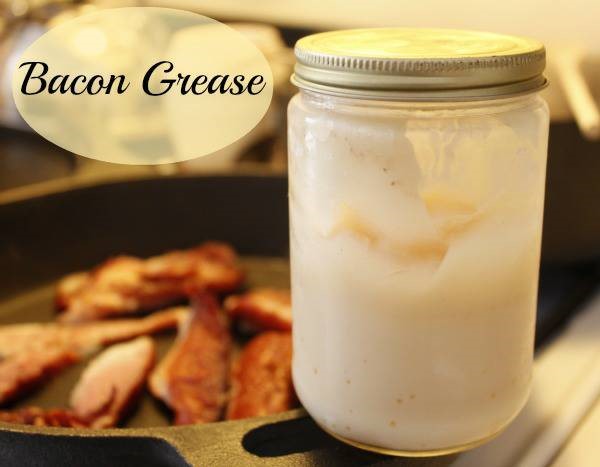
The recurring advice is to store bacon grease in a glass or metal container with a tight-fitting lid because most fats can absorb surrounding flavors, and are susceptible to spoilage. It’ll stay fresher longer in an airtight container and then keep it in the refrigerator or freezer.
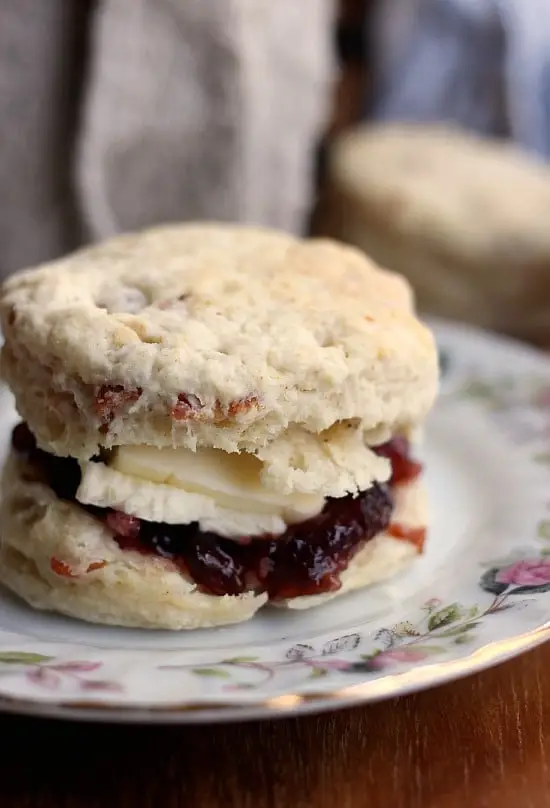
Paul likes to freeze his bacon grease in small silicone molds. Then when they’re solid, he pops them out into a zippered freezer bag so he has easy individual portions ready for any recipe. I’ll close with his tip and his recipe for buttermilk and bacon fat biscuits. If you try these, please get back to me and let me know what you think. I’d love to know if you like them as much as we do.
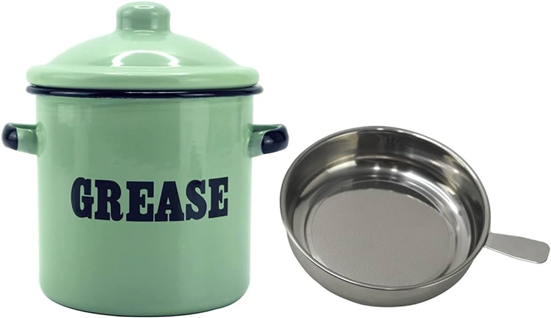
Meanwhile, here’s to saving our bacon grease (and take a look at this CUTE container complete with a strainer, just for saving our grease—on amazon.com for $16). Now we know the secret to adding incredibleness to just about everything!
2 cups all-purpose flour
1 tablespoon baking powder
1/4 teaspoon baking soda
1 1/4 teaspoons kosher salt
6 to 7 tablespoons bacon drippings COLD
1/2 pound (about 5 to 6 strips) bacon cooked and crumbled
1 cup buttermilk COLD
Directions:
Add Recipe to Cook'n
One of the things I’ve learned from him is why I should always keep a jar of leftover bacon grease on hand. This time-honored chef’s trick for replacing cooking oil and adding amazing flavor to vegetables, beans, dressings, and eggs is one that’s been passed down by generations of grandmothers. Paul says it’s THE secret to incredible mashed potatoes, roasted veggies, certain chowders and stews, and…well, he wouldn’t say more than that. But he and other professional chefs swear by it, for very good reasons.
After years of following his advice, I can confidently say bacon grease is in fact, THE secret to so many cooking successes! I like to cook a lot of bacon at a time, so I opt for baking it in the oven. I’ve found it’s less messy this way, and this method gives a consistent color to the bacon and leaves the grease nice and clean. I bake it at 400ºF for 18 to 20 minutes on a backing rack over a sheet pan. Once the pan is cool enough to handle, I collect the grease from the pan.
Keeping your grease free of bacon bits helps it to stay fresh for longer and improves the taste of your future dishes, so straining is key. You’ll want to use a fine mesh strainer over a heat safe bowl (perhaps a spouted glass measuring cup). You can also pour the grease through a coffee filter or cheesecloth. Pour slightly cooled grease through the strainer, using a heat-proof spatula to capture all of that bacony goodness.
Though generations of grandmas have kept bacon grease on the counter, food scientists recommend storing it in the refrigerator or freezer. A common caution I kept seeing in my research was: "It's best to not keep the bacon grease at room temperature because any microparticles of the bacon can cause the grease to go rancid."
The recurring advice is to store bacon grease in a glass or metal container with a tight-fitting lid because most fats can absorb surrounding flavors, and are susceptible to spoilage. It’ll stay fresher longer in an airtight container and then keep it in the refrigerator or freezer.
Paul likes to freeze his bacon grease in small silicone molds. Then when they’re solid, he pops them out into a zippered freezer bag so he has easy individual portions ready for any recipe. I’ll close with his tip and his recipe for buttermilk and bacon fat biscuits. If you try these, please get back to me and let me know what you think. I’d love to know if you like them as much as we do.
Meanwhile, here’s to saving our bacon grease (and take a look at this CUTE container complete with a strainer, just for saving our grease—on amazon.com for $16). Now we know the secret to adding incredibleness to just about everything!
Buttermilk Bacon Fat Biscuits
Ingredients:
2 cups all-purpose flour
1 tablespoon baking powder
1/4 teaspoon baking soda
1 1/4 teaspoons kosher salt
6 to 7 tablespoons bacon drippings COLD
1/2 pound (about 5 to 6 strips) bacon cooked and crumbled
1 cup buttermilk COLD
Directions:
Cook the bacon until crispy, and strain the fat through a fine-mesh sieve to save. Put in the refrigerator for at least 30 minutes to solidify. Crumble the bacon.
Position an oven rack to the center position and preheat to 450°F.
Line a sheet pan with parchment paper or a silicone baking mat.
Measure out all ingredients. Keep the buttermilk and bacon fat cold in the refrigerator.
MAKE BISCUITS
1. In a large mixing bowl, whisk together the flour, baking powder, baking soda, and salt.
2. Add the cold bacon fat to the mixing bowl and cut it into the flour mixture with a pastry blender. Continue cutting the fat into the flour until most of the pieces of fat are about the size of peas with some pieces being about the size of a walnut half.
3. Toss the cooked crumbled bacon into the flour/butter mixture.
4. Add the cold buttermilk into the bowl and stir with a spoon or a silicone spatula just until combined. This should only take a few turns. The dough will be wet and sticky.
5. Turn the dough out onto a lightly floured counter. Dust flour over the top of the dough. With floured hands bring the dough together into one mass.
6. Pat the dough out (do not roll with a rolling pin) until it is about 1-inch thick. Using a bench knife (or a metal spatula can be helpful if you do not have a bench knife), fold the dough in half and then turn it 90 degrees. Pat out and fold again for a total of 6 times. This process is creating layers that will create flaky biscuits.
7. Press the dough out to about 1-inch thick and use a round cutter that is about 2.5-inches in diameter to cut out your biscuits. When cutting out, dip your cutter in flour, press straight down, and pull it back up without twisting it. Twisting can seal the edge of your biscuit, not allowing it to rise fully. Gently pat the scraps together to cut out the rest of your biscuits. Alternatively, you can pat the dough into a rectangle and use a sharp knife to divide the dough into 8 rectangular-shaped biscuits.
8. Place the biscuits on a parchment-lined baking sheet with the edges touching so they will rise up against each other.
9. As an optional step, place the sheet pan in the freezer for 10 minutes before baking. This will ensure that your biscuits will not spread too much and will allow your oven to fully pre-heat.
10. Bake at 450°F/230°C for 13-15 minutes until golden brown. Do not open the oven door for at least the first half of baking time. You want the steam to stay trapped in the oven to help with the rise.
11. Brush biscuits with melted butter and sprinkle with flaky salt if desired.
NOTE: Biscuits are best eaten fresh, but they can also be stored after completely cooled at room temperature and wrapped in foil for 2 days. Alternatively, you can freeze the biscuits raw and bake straight from frozen at 425°F for 18-21 minutes, until baked through.
Recipe formatted with the Cook'n Recipe Software from DVO Enterprises.
 Alice Osborne
Weekly Newsletter Contributor since 2006
Email the author! alice@dvo.com